TL;DR: Controller said RAID1 was lost after disks being powered on for first time after 20 years, I didn’t believe it. Booted into Linux and dd’d the last good disk. Recovered the UFS filesystem, I have 20 year old artifacts to sift through. Always take images of your drives before mucking with them.
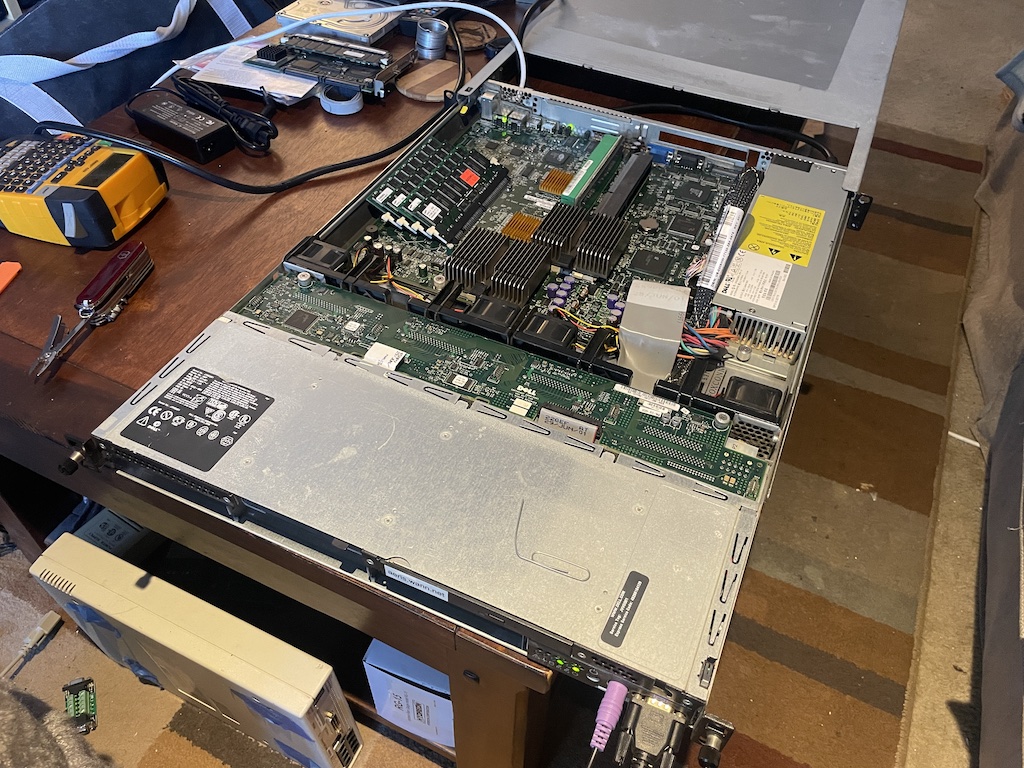
The main database server / admin server for my old ISP was a Dell PowerEdge 1550 1U server running Solaris 8 x86, on three 36 GB Seagate Cheetah SCSI U160 hard drives. It was shut down in 2004 when I folded the company, but I hung on to the drives in case I needed the records for disputes or something, and repurposed the server as a colocated shell server. I almost took the system to e-waste a few months ago when I was purging a bunch of other old rackmount servers from my storage unit, but decided to hang on to it for whatever sentimental reason a little longer.
Recently I was digging through old files to find old ISP setup notes. I found what I needed on my laptop, but it made me remember I still had the ISP drives and I should see if I had any more vintage notes and squirrel away an image of the OS so I could finally ditch the hardware. I had no intention of ever firing this stuff up again and considered it a forgotten memory. The old hard drives have been in my drive collection in the bedroom, so that’s about as good as storage as they get.
In search of RAID
During the time at the ISP the server was using a Dell/Adaptec PERC hardware RAID controller, so I’d need that to revive the data. I took the controller out when I switched to Linux with software RAID using the on-board Adaptec AIC-7899 SCSI controller, and I have no idea what I did with it. I probably e-wasted it a long time ago. So first thing I needed to do was find out what kind of PERC card it had and go find one on eBay. My system was so old I couldn’t even look up the service tag on Dell’s website anymore. The PowerEdge 1550 has been lost to time, there’s very few photos of it online, and none that I found with a PERC installed to reference. I guessed from some service notes and went with a Dell 493 PERC 3/DC card, which sounded vaguely familiar and was around the right vintage.
I made sure the system could actually power on and put in a set of Linux disks from the colo days. Other than a dead CMOS battery, the system eventually booted into Linux as a test just fine. I have no idea why but it takes several minutes for POST to run and load the Adaptec 7899 BIOS, I don’t remember it being this achingly slow.
Next it came time to try the Solaris hard drives. I had no idea what RAID configuration I used, I kind of assumed I probably did a RAID 5. No idea of the order of the drives. I wasn’t even sure which version of Solaris was on there. I first powered up the system without the drives, went into the PERC firmware and reset all the logical device configuration to defaults. I popped in the Solaris drives and right away on boot the PERC BIOS spun up two drives.
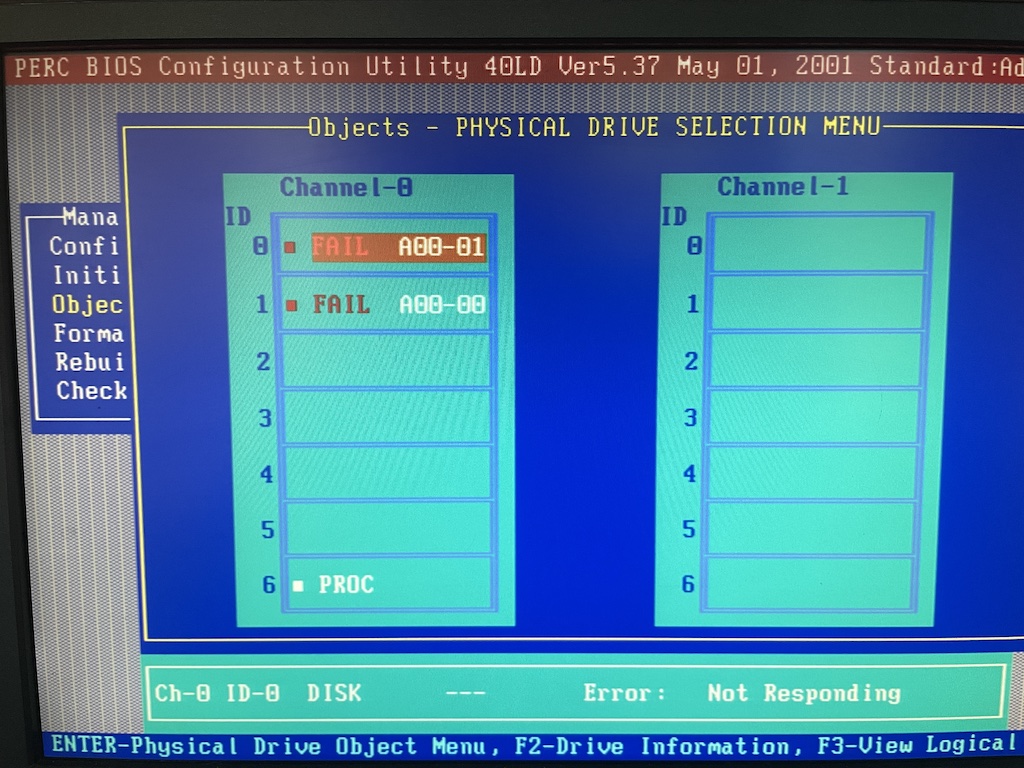
Going into the PERC BIOS again, it had imported a RAID1 configuration from the drives. Two drives were in a logical group, one marked ONLINE and one marked FAIL. The third drive was marked as HOT SPARE. That was a promising start!
A brief glimmer of hope after 20 years
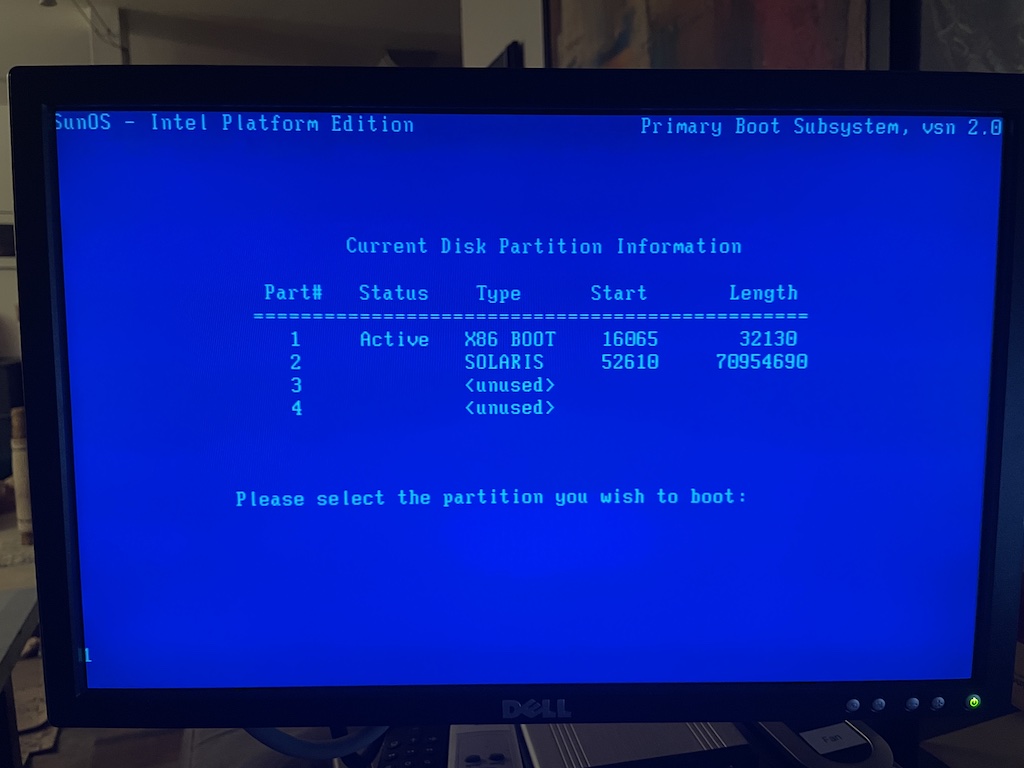
I didn’t put a lot of care into trying to recover this, it was more of a nice-to-have. #YOLO. I let the system boot, told the PERC to proceed with the degraded logical volume group. Up pops the blue Solaris Boot Subsystem screen! Right at this same time the PERC alarm starts SCREECHING because of the failed drive and it was LOUD. I had forgotten all about this and there were no buttons or anything anywhere to silence it. There’s no way I could work on this thing in an apartment with that going off.
I hit the power button to turn off the system, turned it back on and went back into the PERC menu to silence the alarm. Except now in the PERC BIOS all drives were marked FAILED! wtf!
Artists re-enactment of RAID failure
I wasn’t completely convinced the drives died all of a sudden after one power-off and thought it was more likely there was some sort of bad state stored in the RAID configuration from the power-off. I fiddled with it for a while, trying to remove the config from the card and re-importing it, moving drives around in drive slots, and it kept coming back as FAILED. One of the disks had to still be working to read the RAID config I thought. I also didn’t know the numbering of the drive slots, so I wasn’t sure which two were the data drives and which was the hot spare anymore. Did I mix the old hot spare into an order it expected to find a RAID member? Did one RAID member just die?
So I put it all aside for a few weeks to ponder.
What to do
If it was a RAID1 I thought in theory both drives should have a usable set of data outside the RAID metadata, provided they were still mechanically functional. Even if the sync was broke and one had a slightly older set of writes, this was fine for this archeology dig. The question was if the RAID metadata would throw off any tools to poke at the filesystem. Message board posts all suggested if anything hooking the drives up to a non-RAID SCSI controller to take the hardware RAID out of the picture and taking images of the drive if they showed up, that way they could be experimented on with recovery tools. This was slightly more complicated in that the Solaris 8 filesystem is the older UFS, not ZFS or EXT3/4. Several commercial packages promised they could recover UFS for a modest three digit sum.
I decided on hooking the Dell drive backplane directly to the onboard Adaptec SCSI controller and booting Linux. If the drives showed up I could at least dd a copy of them to fiddle with later and would have more tools to poke at the SCSI bus.
Getting Linux over was going to be work, the system didn’t support booting from USB. It had an IDE CD-ROM drive, a 3.5″ floppy drive, and could network PXE boot. While I have a functioning PXE environment and actually PXE installed CentOS on this system when I had it in colo, I long since removed my old CentOS 5 files. Rigging up a PXE bootable Live ISO image just for this sounded like a lot of work. Ubuntu 14 server was the latest i386 version I could find that still fit on a CDR disc. Miraculously I still had five blanks laying around. The only CD burner I owned was in my Windows 95 machine, so instead of shelling out money on Amazon for another external burner, I went to a lot of effort to just burn it using the 486 (at 2x!).
Of course when it came time to boot, the CD drive in the Dell was not working anymore. I wound up throwing together enough PXE glue anyways to boot the CentOS 6.10 i386 installer in rescue mode. This kernel should well be new enough to have all the 2000-era Adaptec drivers built-in.
Struck data!
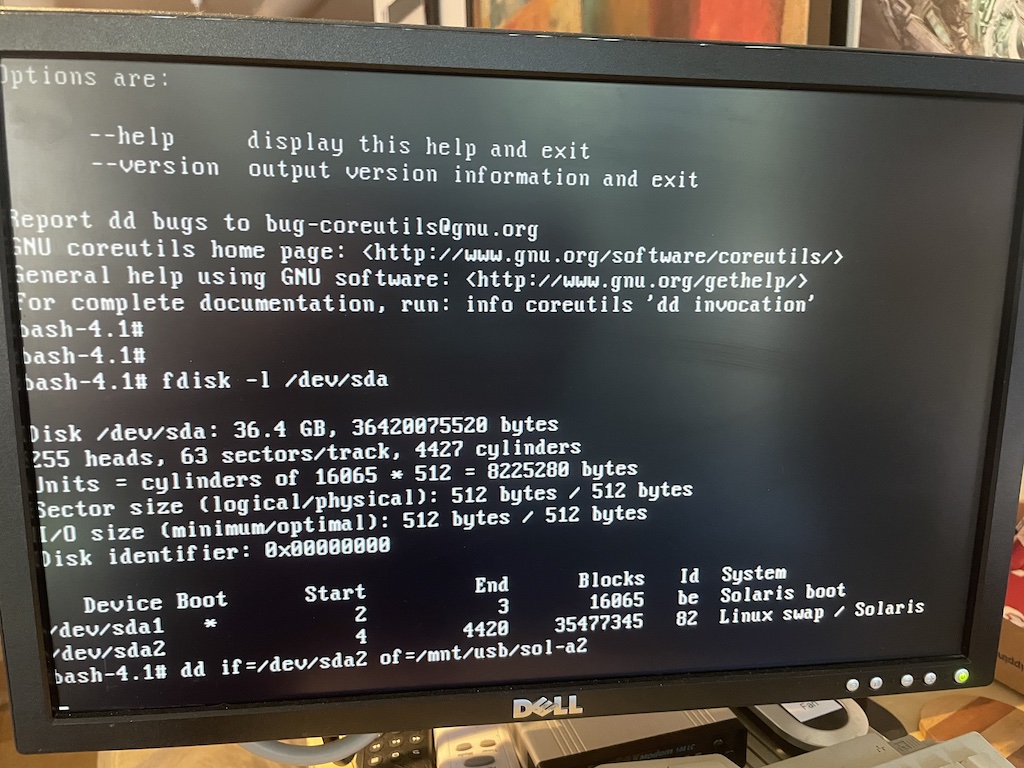
One by one I tried all three hard drives. The first one oddly showed part of a serial number to the Adaptec BIOS, but otherwise was undetected by Linux. The second drive showed up! An fdisk -l detected two partitions, “Solaris boot” and “Linux swap / Solaris” !!!
 I popped in a USB stick which at least showed up as a mass storage device to Linux and I began a dd of the hard disk to it. About 15 minutes later I checked progress on another vty and quickly realized it had only copied a few dozen megabytes and this was probably using USB 1.1 or maybe 2.0 and it was going to take all night to copy this drive. Would the hard disk survive this long? I threw together a dd | ssh command and let it copy a couple of images across the network to another system. It’s a Pentium III 933 MHz system, so not a complete slouch.
Eventually after a couple of hours the dd over the network succeeded without any sort of errors, so I had at least one copy of whatever was on that disk. I have no idea if that was a working member of the RAID1, or if once upon a time it was part of the RAID1 and I demoted it to hot spare without wiping it, or what. The 3rd disk was completely dead, it didn’t show up on the Adaptec at all. So it seems I did lose one disk during my initial power-off.
After I was satisfied I got a good as copy possible, I let the good disk boot in the system by itself to see what would happen. The blue Solaris bootloader screen loaded, then dropped into the configuration assistant. It didn’t seem to find a kernel on disk to boot, but otherwise the disk acted fine.
Over on another Linux system I ran “strings” on the 36 GB image I captured and it clearly had some viable data in it. I saw a bunch of email, sendmail config, html, mysql commands, and other stuff I recognized. Now the question was how to mount this sucker under Linux. I did some reading and Linux does have UFS support, including Sun x86. I learned that Solaris slices are different than typical Linux partitions in that they’re more a set of logical extended partitions within a standard partition. The Linux kernel with the UFS module loaded understands this and as I saw with the Solaris drive inserted over on the Dell, it will enumerate all the possible slices as extra disk partitions, e.g. sda1 sda2 sda3 sda4 sda5 ... sda15 even if tools like Linux fdisk and parted only see a boot and data partition.

Linux recognizing Solaris disk slices
Here’s what fdisk looked like when reading the captured dd image itself:
root@basic06:~# fdisk -l ./image-sda2
Disk sda2: 33.9 GiB, 36328801280 bytes, 70954690 sectors
Units: sectors of 1 * 512 = 512 bytes
Sector size (logical/physical): 512 bytes / 512 bytes
I/O size (minimum/optimal): 512 bytes / 512 bytes
Disklabel type: dos
Disk identifier: 0x69747261

Device Boot Start End Sectors Size Id Type
sda2p1 1851867950 2396369563 544501614 259.7G 6f unknown
sda2p2 1397314113 3266884704 1869570592 891.5G 20 unknown
sda2p3 0 0 0 0B 6f unknown
sda2p4 20480 20480 0 0B 0 Empty

Partition table entries are not in disk order.
Trying to mount UFS from Linux
(See 9/26 update where a newer kernel fixed all this) I tried a variety of ways trying to mount the UFS filesystem on Linux with no luck. Neither “mount -t ufs -oro,ufstype=sunx86” on an extended device id for a slice such as /dev/sda10 worked, nor on the raw image file of just the 2nd Solaris data partition nor image of the entire disk. I tried some examples of calculating offsets to mounting specific slices or possibly avoid any RAID metadata and those didn’t work. I got a variety of wrong fs type, bad option, bad superblock, or ufs: ufs_fill_super(): bad magic number errors with these attempts. losetup and friends didn’t seem to work for me either, which to be fair I’ve never used.
Another idea I had was to copy the image to a USB stick on another system and letting the kernel detect it as a drive again. Trying to mount it this way didn’t work while I was booted into CentOS 6, I thought maybe a newer kernel would help. I let it copy to USB while I went on to try the next thing, installing Solaris. (I wound up not using this)
Installing a Solaris 8 VM
I gave up and installed Solaris 8 Intel in a VirtualBox VM to see if I could mount the image there.. It’s been yeaaaaars since I’ve touched Solaris, much less v8, but I got something working. I had to convert the dd image to a .VDI image so VirtualBox could actually present it as a drive to the VM. (“VBoxManage convertdd image1-sda image1-sda.vdi --format VDI“).
Within Solaris I had to run devfsadm after boot to get it to recognize this as another IDE drive. It showed up as /dev/dsk/c0d1, and “format” listed a bunch of slices when it was mounted!
 Finally, success!
At long last I was finally able to mount the individual slices! and there was intact filesystems with my files!
Browsing around it looked familiar, all bits and pieces of a working system. It looks like this stuff is somehow from about 2003, so this may be leftover from a drive swap, I don’t know.
I also forgot Solaris doesn’t have anything like ssh or rsync out of the box, or I forgot where to install it. So I’m going old-school and running a “tar | rsh” to another system to sift through it more.
I am curious to go looking for the hardware RAID metadata on this disk, is it at the beginning, the end? What does it look like?
Update 9/26:
Fiddling with the whole disk image on a CentOS 7 system with a 5.3.5 kernel, I have success mounting the UFS filesystem, whereas this was failing over on Ubuntu 18 with a 4.15 kernel:
# Mounting with a loop device
[root@basic03 ~]# losetup --partscan --find --show ./staff1-9pf-sda
/dev/loop0

[root@basic03 ~]# dmesg -T
[Thu Sep 26 23:46:44 2024] loop: module loaded
[Thu Sep 26 23:46:51 2024]  loop0: p1 p2
  p2: <solaris: [s0] p5 [s1] p6 [s2] p7 [s3] p8 [s4] p9 [s5] p10 [s6] p11 [s8] p12 >

[root@basic03 ~]# fdisk -l /dev/loop0
Disk /dev/loop0: 36.4 GB, 36420075520 bytes, 71132960 sectors
Units = sectors of 1 * 512 = 512 bytes
Sector size (logical/physical): 512 bytes / 512 bytes
I/O size (minimum/optimal): 512 bytes / 512 bytes
Disk label type: dos
Disk identifier: 0x00000000

      Device Boot      Start         End      Blocks   Id  System
/dev/loop0p1   *       16065       48194       16065   be  Solaris boot
/dev/loop0p2           52610    71007299    35477345   82  Linux swap / Solaris
[root@basic03 ~]#

[root@basic03 mnt]# mkdir s0 s1 s2 s3 s4 s5 s6 s7 s8 s9

# Mounted Solaris slice 0 containing / using the linux /dev/loop0p5 partition
[root@basic03 ~]# mount -oro,ufstype=sunx86 /dev/loop0p5 /mnt/s0

[root@basic03 ~]# mount | grep mnt
/dev/loop0p5 on /mnt/s0 type ufs (ro,relatime,ufstype=sunx86,onerror=lock)

# Solaris / directory!
[root@basic03 ~]# ls -l /mnt/s0
total 39
lrwxrwxrwx  1 root root     9 Sep 24  2001 bin -> ./usr/bin
drwxr-xr-x  2 root root   512 Sep 24  2001 boot
drwxr-xr-x  3 root 60001  512 Sep 24  2001 cdrom
drwxr-xr-x 12 root sys   3584 Sep 27  2001 dev
drwxr-xr-x  6 root sys    512 Sep 24  2001 devices
drwxr-xr-x 30 root sys   3584 Jun  8  2003 etc
drwxr-xr-x  3 root root   512 Sep 24  2001 export
...