Feed on
Posts
Comments

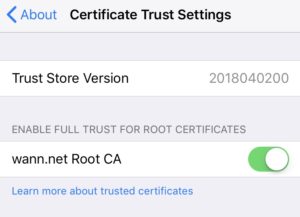
I renewed my mail server’s TLS certs the other day and noticed that Alpine had problems verifying my certificate chain. (Yes I still use a text based email).

(Of course after I figured all of this out and changed my Google queries a bit, I found where other people hit the same problem back in 2016 and came to the same conclusion.)

When I ran openssl against my IMAP-SSL server on port 993, the various intermediate certs were okay but I saw this message:

139713136498592:error:14082174:SSL routines:ssl3_check_cert_and_algorithm:dh key too small:s3_clnt.c:3636:

Likewise in the courier-imap log I saw this corresponding entry:

imapd-ssl: couriertls: accept: error:14094410:SSL routines:ssl3_read_bytes:sslv3 alert handshake failure

Puzzled in that my other Mail clients like on OS X and my iPhone work just fine, and there isn’t a way to twiddle with forcing SSL/TLS protocols that Alpine uses, I started randomly fiddling knobs.

One thing I learned out of all of this that you can actually use curl to speak to an IMAP server. I tried that to see if it gave me any extra insight and it kind of did:

$ curl "imaps://bwann@example.com"
curl: (35) SSL received a weak ephemeral Diffie-Hellman key in Server Key Exchange handshake message.

This lead me to go fiddle with the dhparams.pem file that Courier IMAP depends on. The monthly cron job that runs /usr/lib/courier-imap/sbin/mkdhparams generates Diffie-Helman parameters using a 768-bit key. This seemed sort of puny, so I edited BITS=768 to say BITS=2048, blew away the old dhparams.pem file and generated a new one with 2048 bits.

Now when I run curl without a password, I get an auth failure instead of an SSL error. Ah hah!

$ curl "imaps://bwann@example.com"
curl: (67) Authentication failed: 78

Now Alpine works just fine.

A/K/A Ubuntu for CentOS kickstart users

I needed to install Ubuntu on a server so I finally got around to figuring out how to do an automated, unattended installation. Specifically, how to install Ubuntu on bare-metal over the network using an existing PXE setup in an all-CentOS environment, as you would in a datacenter. I will attempt to compare CentOS+kickstart installations vs Ubuntu+preseed installations based on my experience. There are some initial similarities in how things are setup, but not too many.

This is not a how-to, but a bridge to get started with Ubuntu. I’ve linked to any scripts I’ve used and where I originally found them.

TL;DR: Overall I’m not impressed with Ubuntu’s way of doing things. While at the end of the day you get an OS on disk, it takes a lot more clever work if you want to add any sort of local customizations particularly around hardware. CentOS/kickstart installations provide much more flexibility to run more things before and during installation, and easier to get in and troubleshoot. Kickstart becomes very handy if you need to setup things (via script, not by hand) beforehand like hardware RAID, flash cards, or conditional partitioning of disks.

PXE / netboot setup

Setting up your PXE environment for Ubuntu is basically identical to handling CentOS kickstarts. You serve the Ubuntu kernel+netboot initrd via HTTP or TFTP, save the same sort of config file to your bootloader of choice (PXELINUX, iPXE, etc), and tweak some different kernel command line options, and that’s it.

Setting up a local release mirror (e.g. Xenial)

(Disclaimer: I’m serving Ubuntu releases and repositories from a CentOS system)

A local release mirror is similar to CentOS is that once you get the files on disk, they’re served up from your HTTP server to clients the same way. Creating an Ubuntu/apt mirror on a CentOS system takes some work because obviously there’s different package managers and layouts involved. You could rsync the entire upstream Ubuntu repo, but this seems to include a lot of non-used stuff. There’s an RPM (in EPEL) and perl script called debmirror that takes care of using dpkg/apt tools and copying the bits you want onto your local repo server.

However there’s a snag with debmirror out of the box that I found. On CentOS, the RPM lays down both the script and a configuration file in /etc/debmirror.conf. It defaults to wanting to download the i386 version of the sid distribution. The comments in the config about command line options overriding the config are complete lies. Arguments are *appended* to what’s in debmirror.conf, so you wind up getting more than what you want.

The problem here (if you’re not aware of that config), is that debmirror will happily mirror your requested release, but then it also tries to download and do GPG checks of the sid release. Because you don’t have sid, it errors on a GPG check failure. Of course the Internet is stupid and says “just disable GPG checks”, instead of actually changing /etc/debmirror.conf.

Setting up local APT packge repositories

This is a local repository where you keep all of your own/third-party DEB packages (e.g. Chef client), seperate from the upstream (e.g. Xenial) release files.

Again, once you have a repository created it’s identical to a local CentOS mirror and served up over HTTP. To generate the package metadata on CentOS, you’d run createrepo. To create Ubuntu package metadata, you’re left to your own devices. There’s a decent shell script[1] out there called reindex_stable.sh which takes care of using dpkg tools to create all of the package indexes and generate SHA checksums. I’ve put my version of this up on Github[2].

Once you have the reindex script working it’s basically the same as running createrepo for CentOS.

  1. http://troubleshootingrange.blogspot.com/2012/09/hosting-simple-apt-repository-on-centos.html
  2. https://github.com/bwann/ubuntu/blob/master/reindex_stable.sh

Installer and configuration

Ok, this is the meat of the installation process. “Preseed” files are Ubuntu’s equivalent to kickstart config files. They answer installer questions as if you were going through them on console. Like kickstart configs, they can be served up over HTTP so the installer can download it.

Preseed files vs kickstart

Technically Ubuntu does let you use kickstart files[1], but it doesn’t support all the directives and options. Under the hood it’s just running shell scripts[2] to transform kickstart directives to preseed directives. Rather than try to shoehorn my existing kickstart configs to meet Ubuntu’s need, I just decided to go native and create my own preseed files.

The internet is littered with copypasta preseed files, just like random modem init string collections from the 90s. I’m not convinced people know exactly what options they’re using and why.  An example of a basic preseed I used up with is up on github[3].

Pros of preseed files:

  • They’re pretty short and succinct, mainly because there’s not a lot of heavy lifting you can do with them.
  • Every possible configuration option available and set during installation will be written to /var/log/installer/cdebconf/questions.dat on an installed system
  • There’s at least an option to change how filesystems are mounted, via UUID, label, or device names. UUIDs suck, use labels.

Cons of preseed files:

  • The closest equivalent to kickstart’s %pre/%pre-install/%post sections are preseed/early_command, partman/early_command, preseed/late_command. You can only have a single command directive in the preseed file, so if you have a bunch of commands to run (or god forbid a script), you have to end each line with a semicolon and backslash. The entire line is consumed as one line, ugh. Or, you’re going to have to use this to download a script holding your bigger scripts.
  • preseed/late_command is the equivalent to “%post --nochroot“. If you want to run commands within the target install, you have to use the in-target wrapper as part of the late_command string.
  1. https://help.ubuntu.com/community/KickstartCompatibility
  2. http://bazaar.launchpad.net/~ubuntu-installer/kickseed/master/files/head:/handlers/
  3. https://github.com/bwann/ubuntu/blob/master/base-preseed16.cfg

SSH to an installing system

One of the big things I miss with Ubuntu’s installer is being able to SSH into a host while it’s being installed. On CentOS, you can pass the inst.sshd option and set a password with sshpw in a kickstart file. This lets you log in while Anaconda is doing its thing to look at logs, troubleshoot your pre/post scripts, attach to the tmux session Anaconda is using, or have your build system interrogate the system to track its process, among other things.

Ubuntu has “network-console” you can enable, but this only starts an interactive installer session when you ssh in. The menu will let you launch a shell and look at logs, but it’s no longer an unattended installation. I get it, I can see the use case, but it’s not what I want. There’s not an easy way to hack this into Ubuntu without some heroic preseed/early_command setup. It’s probably best to re-build your own installer image with OpenSSH, config, and a key baked into it. Otherwise your only option to check on an unattended installation progress is to hop on VGA or serial console.

Bugs!

I hit at least two installer bugs that forced me to change how I did things (as of November 2018):


This about wraps up my experience with Ubuntu installs. I’ve installed exactly one system (many times) so I don’t know of any other tricks to throw at it.

It turns out when you run debmirror on CentOS 7 from EPEL, it sneakily (not really) lays down a configuration file in /etc/debmirror.conf. Despite the ‘-d‘ argument, e.g. ‘-d xenial,xenial-security,xenial-updates‘, it happily tries to mirror the sid distribution. I saw other people having this problems and it was maddeningly to finally figure it out at 2 AM. So here’s to all you intrepid Google searchers:

Running debmirror with options something like this:

debmirror -a amd64 --no-source -s main,restricted,universe,multiverse \
  -h archive.ubuntu.com -r /ubuntu --progress -e rsync \
  -d xenial,xenial-security,xenial-updates /mnt/dist/ubuntu/16.04.3/amd64

Does this:

*** Processing arch: amd64
Mirroring to /mnt/dist/ubuntu/16.04.3/amd64 from rsync://anonymous@archive.ubuntu.com/ubuntu/
Arches: amd64,amd64
Dists: sid,xenial,xenial-security,xenial-updates
Sections: main,main/debian-installer,contrib,non-free,main,restricted,universe,multiverse
Pdiff mode: use
Download at most 200 files per rsync call.
Will clean up after mirroring.
Attempting to get lock ...

And it finally dies downloading dists/sid/Release even though we didn’t specify it on the command line.

Ubuntu Release file: using Suite (xenial-updates).
Errors:
 Download of dists/sid/Release failed
Failed to download some Release or Release.gpg files!

The sid coming from /etc/debmirror.conf (the comment at the top about overrides is fucking lies):

# Options specified on the command line override settings in the config
# files.

@dists="sid";
@sections="main,main/debian-installer,contrib,non-free";
@arches="i386";

So change this to whichever dists and architectures you want, or comment these out of the config files.

I haven’t figured out a proper patch/config for this, at this point I’m not sure I really care this much. The internet seems to thing disabling signature checks is a good idea, and they’re WRONG. This is important to ensure integrity of your downloads, to ensure you’re getting the right goods and they’re completely downloaded.

If I stick fiddling with Ubuntu maybe I’ll come out with a better config.

Titan Missile Museum

9-megaton warhead on a Titan missile

I forget how I came across it, probably Reddit, but I watched the movie Command and Control. It was a documentary focused on an accident in 1980 where a Titan II missile exploded in the silo outside of Damascus, Arkansas (wiki article). I was surprised I’ve never heard of the incident before because I grew up not far away in Oklahoma. I even asked my parents about it, they said they hadn’t heard of it before either. It’s a pretty good film, it explained a whole string of nuclear weapons safety issues over the years and it’s surprising we haven’t blown ourselves up several times over. I also read the book by Eric Schlosser which the film was based on. Googling around I discovered there’s still a preserved, functional Titan silo complete with an inert missile and warhead in Arizona, so I had to go see it.

I found out there’s a few different tours, the one I took was just a basic one hour tour that went to the control center, another was directed by a former commander, and another was a “top to bottom” tour where you got to go to all levels. I really would like to do the latter, but slots and dates are limited and it didn’t match my schedule. Based on reading the book and watching the film several times I was pretty familiar with the missile and complex. The tour felt rushed, there was so much I wanted to look at and take photos of, but we were hustled through and back out.

The tour starts with a several minute long video that explains the Titan program, the 308th Strategic Missile Wing, and an overview of the launch complex. Next we went outside and into the access portal, a set of stairs and an elevator that went underground. We were told that from the moment the gate on the road opened, crews had three minutes to make it to the portal before alarms went off as a security precaution. First stop underground was another door/gate where personnel would call, read a passcode, then burn the piece of paper with the code in a red can on the wall.

Several floors down put you in front of blast door #6. This puts you into a blast lock, where door #7 on the other side of the room won’t open until door #6 is secure. The blast lock is designed to protect the crew from a surface attack. From here there’s a junction, one way leads to the missile silo, the other leads to the control center, each of which are protected by another blast door.

We went into the control center, which was on level 2. Level 1 above us was a crew quarters, level 3 below us was a mechanical room that contained the air conditioner. All three levels were suspended together from giant springs to protect against blast movement. There was a center console and a row of electronics along one wall, all of which still worked and was powered on.

The docent explained how the crews worked, what their daily routines were, what happened when a drill or launch order happened, and finally simulated what would happen if they launched. A little kid at the center console and the docent turned their launch keys, next thing that happened was a perimeter security alarm bell went off signaling that the silo door had opened, then a fire alarm went off indicating there was (surprise) a fire in the missile silo. After that he said, the missile was away, there’s no way to stop it, nothing else is left to do, and now the entire launch complex was now useless.

We then went over to the missile silo. There were a couple of open doors where we could see the missile from level 2 and look up at the warhead. After this we were shuttled back up to the surface where we were free to roam around topside. The silo door was partially opened with a glass lid, so you could look down into it from a platform. In a small shed were first and second stage engines on display, as well as a fuel truck on the fueling pad.

The gift shop had all sorts of interesting loot for sale, pieces of metal from the missiles, rebar, dosimeters, patches, technical books and diagrams, signs. Also in the lobby was a small exhibit of the Damascus incident, including a big socket like what was dropped down the silo. I want to go back for the top down tour, looking at their schedule they’re booked a few months out, so maybe January or February.

[flickr: trinity site]
[flickr: white sands missile museum park]
[flickr: new mexico museum of space history]
[flickr: titan missile museum]

The very first detonation of a nuclear device happened in New Mexico and was called “Trinity”. Two times a year people can go out onto the White Sands Missile Range to visit the Trinity site. I hit the road and visited the site a couple of weeks ago. It turns out it’s a long drive from the Bay Area to Alamogordo, New Mexico. The first day I put in 12 hours of driving, slept at a rest stop between Phoenix and Tucson, and then about 8 hours the next day.

But first I wanted to make a detour to the Sonoran desert in Arizona. A while back I had found that in 2010 BLM put up these big scary “DANGER – PUBLIC WARNING TRAVEL NOT RECOMMENDED” signs due to smuggling and trafficking on public land along I-8. I wanted to go see one of these things out of curiosity. (Yeah, put up a sign that says don’t go there, I want to go there. Also hooray for Arizona having constitutional open and concealed carry, I felt the freedom wash over me as soon as I hit the border.) Through the Sonoran Desert National Monument along I-8 there actually weren’t that many exits off of the interstate. To get onto BLM land, was one at MM 144 for Vekol Valley Road, MM 140 for Freeman Road, and then a couple around Gila Bend, the next city on the interstate.

2010 BLM travel danger sign

More tame sign on BLM land

I didn’t have a good map of the BLM roads, Google Maps and my Garmin maps were pretty useless for this, and the BLM website is pretty dorky. I nosed around on Freeman Road a bit and only found a tame “Active Federal Law Enforcement Patrol Area” sign. Same at Vekol Valley, except this time I found a paper map I could take. I will say the established gravel roads are pretty good and well marked with numbers. Deciding not to get too far in the middle of nowhere I came back to the highway. Later I found out the big scary warning signs caused such an uproar and embarrassed the government so much they replaced them a few months later with the tamer signs I saw. If anyone knows if there are still big scary signs out there, I’d love to know where!

Trinity site tour

I stayed in Alamogordo and quickly figured out it was a lot farther to the Trinity site than I thought. It turns out WSMR is huge, probably 100 miles wide and even more miles long. The only public entrance was Stallion Gate, at the northern part of WSMR. This was about 120 miles away from Alamogordo. There was an escorted vehicle convoy that left just north in Tularosa which cut directly across the range, cutting the distance down to about 70 miles. However it was slower, so from a time perspective I think it was a wash. The upshot is that you get to see much more of the range as you travel through. Downside is there isn’t much to see except desert scrub and the occasional launch site, and photography or stopping was prohibited.

There were 100-200 vehicles in the convoy and we arrived at the site around 10:45 AM. There was a huge parking lot by the Trinity site and a string of cars coming in from the northern gate. In the parking lot were a couple of vendors selling food and souvenirs, porta-potties, the Jumbo test casing, and a ton of police, military police, and a lot of other Army and Navy folks. A short walk leads to the actual ground zero test site. Within the fenced in area (a couple of acres in size) was a monument to the Trinity test, a tractor-trailer hauling a Fat Man casing, a concrete stub where the test tower was, and string of historical photos hanging on the fence. There was a sign reminding us that there was still some scant radiation here, but 1 hour at the site was less than 1/10th the exposure of a chest x-ray.

There was also a ton of people because everyone got there at the same time. Everyone was jockeying for position to get photos with the monument and milling around the Fat Man trailer. I was amused to overhear this one bit of conversation:

Girl 1: That kid was dabbing while he got his photo taken, that's so disrespectful.
Girl 2: Disrespectful to who?

Yes, disrespectful to who? Nobody is buried here. Anyways the photos along the fence were interesting, it showed how the site looked before testing, the nuclear fireball, and what things looked like after.

Trinitite

If you looked carefully on the ground, you could spot some bits of trinite that hadn’t been buried, but largely it had been picked pretty clean over the years. In theory you’re not supposed to remove it because “theft to the government”, good luck enforcing that. There was a table at the entrance where a docent had a box of trinite you could look at and stick a geiger counter to it.

What was interesting about the site and not really easy to show in a photograph was that the whole test area was in a huge depression. According to the docent, beyond the actual bomb crater and the sand that was turned to trinite, there was about a 4 foot layer of desert sand kicked up and displaced after detonation. It looked like the fenced in area contained the entire depression, it was most visible from the parking lot.

I wanted photographs without people in the background, so I lingered around for a couple of hours until the Alamogordo convoy left. This means I’d have to leave north through the Stallion Gate. After 1 PM things started thinning out and I was mostly able to get the photos I wanted. I missed out on visiting the McDonald House, I didn’t see that there was a separate shuttle that went over to it.

When I left the range and got back on the highway, there was a guy named “Atomic Steve” selling hunks of uranium. There was also a sign directing people to where trinite was for sale. Some may say that’s illegal, but apparently way back when there were considerable mounts to be collected from the land and people are selling it. You’re just not supposed to remove it from the Trinity site.

So pro-tip if you’re wanting to visit only the Trinity site, don’t stay in Alamogordo. Find a place to stay closer to the northwest corner and get there early. From the gate to the site is only about 5 miles. I wanted to check out White Sands National Monument too and wound up discovering the New Mexico Museum of Space History in Alamogordo so that worked out pretty well for me.

White Sands Missile Park

Patriot: If it flies it dies

The same afternoon I left Trinity, I headed south to the White Sands Missile Museum. This was another long haul, about 140 miles from Stallion Gate, through Las Cruces, then over to White Sands. The actual museum closed at 3 PM so I missed it by an hour, but the missile park was still open until sunset. I rolled up to the base gate where police had me park outside the gate and gave me a pass to walk over to the missile park.

On highlight were dozens of missiles and rockets that had been tested at the range. Some were popular, some were unknown to me. There was a Redstone rocket, a Patriot missile system, an Army Pershing missile, various Navy guided missile systems, Nike Ajax and Hercules missiles, and all sorts of other surface-to-air, surface-to-surface, surface-to-ground missiles.

New Mexico Museum of Space History

It turns out there was a lot more early aerospace work done in New Mexico than I realized.  Beyond the Trinity test, Wernher von Braun was stationed in Fort Bliss and they did V2 testing at the White Sands Missile Range. WSMR was where things like the Patriot missile system, Pershing, Redstone rockets were tested. Joe Kittinger did his record setting Project Excelsior skydive from 102,800 feet over New Mexico. Columbia landed here in 1983 as a test for STS-3. Virgin Galactic’s Spaceport America is here. I guess huge swaths of relatively flat, uninhabited, year-round mild weather is pretty useful for this stuff.

Outside the museum building was a collection of missiles and rockets. They had leftovers of a V2 engine from a test, but most impressive was a fully intact F-1 rocket engine which was built for the Apollo program for use in Saturn V rockets. The thrust nozzle material couldn’t have been more thick than a couple of credit cards, and there was an incredible amount of welds that stretched for several feet, every couple of centimeters. I imagine welders at Rocketdyne spent a huge swath of their career just patiently dabbing in welds on a single engine.

Inside the building were mainly exhibits highlighting the aerospace industry in New Mexico as I mentioned earlier. They had several components from the Apollo program on display.

White Sands National Monument

I wish I could’ve spent more time here but I didn’t time it right and I needed to cut my trip short. I made one trip out at 7 PM right after sunset and right before the gates closed. It was pretty tolerable then and the sand made for some neat long exposure photographs. I came back here Saturday after visiting the museum in the dead heat of the afternoon and got cooked. There were loads of people in swimsuits sledding down the sand dunes, treating it like an ocean-less beach. I should’ve waited around a couple of hours for it to cool off before exploring more. I’m told the thing to do is to come out after sunset, setup camp at a campsite, goof around overnight, then leave when the sun comes up. Saving that for next time!

Mileage

10/5
1:56pm  320,502  Fremont, CA  8,431.1 hr
6:18pm  320,782  Tejon
8:35pm  320,909  Fontana, CA
11:05pm 321,092  AZ border
2:09am  321,274  Casa Blanca rest stop
10/6
4:10pm  Deming, NM
10/7
6:35am (M)  321,864  Alamogordo, NM
10:00am (M) 321,940  WSMR staging
10:30am (M) 321,945  Trinity site
10/8
8:23pm  322,573  Tucson, AZ
10/9
9:00pm  Phoenix, AZ
10/10
7:25am  323,243  Tejon rest stop  8,476.7 hr
12:00pm 323,538  Fremont, CA - HOME

[flickr: Death Valley – Wildrose]

I’ve wanted to hike up to Telescope Peak for a while but so far haven’t felt like I’ve been in good enough shape. A few days ago I saw a photo on the Death Valley NP Facebook page showing ladybugs at the summit of Wildrose. I looked it up and it sounded a lot more easier than Telescope, so why not! The trailhead is at the charcoal kilns around 6,900 feet elevation, winds around a couple of ridges, and finally tops out at 9,064 feet. (NPS hike information)

I took off Friday afternoon and of course ran smack into Livermore rush hour traffic which added an hour to the drive. When I got there around 1 AM I hung out at the Mesquite Sand Dunes parking lot trying out my new camera with some star photography. It was cool, moonless night and dead silent. My tinnitus was the only thing I could hear! I basically pulled an all-nighter fooling around, catching a couple of hours of sleep. I noticed people started rolling in at 5 AM to go out onto the dunes, way before the sun came up. I’m guessing they wanted to get set up for sunrise photos; even more people showed up at 7 AM when the sun finally did rise.

Camping at Thorndike

I grabbed breakfast at the Stovepipe Wells restaurant, which by the way has FAR better food than what you can find at Furnace Creek. I wasn’t sure if I wanted to stay at the Wildrose or Thorndike campgrounds, I preferred the latter because it was closer to the trailhead and would help me acclimate to the altitude. On the drive in I noticed there were no trees at Wildrose for shade (or my hammock!), so I headed up to Thorndike which was at 7,400′. There was only one other campsite occupied and there was nobody around. It was considerably cooler than the valley, probably in the 60s. Cool gusts started picking up in the afternoon. When the sun set, it got considerably colder, somewhere in the 40s. burr!

Wildrose Trailhead

Sunday morning I went down to the Wildrose trailhead and set off at 10:20 AM. It was a great day, and three other people left right before me. The hike was mainly under pine trees which smelled great. It got gradually steeper until I got on top of the ridge where I could see the valley floor and Badwater down below. I crossed across the ridge to the actual Wildrose mountain where I met one of the other hikers already coming back down at 1:30 PM.

Ascending above 8,000 got considerably more difficult, the trail turned into punishing switchbacks. I was having to stop at the end of each one to catch my breath, as my heart would be beating in my head. It was less than a mile to the summit but this took over an hour to get up. Finally at 9,000 feet I had reached the top of the mountain but not quite at the summit yet. It was another quarter mile with about 60 feet of elevation to go.

The summit was marked by a pile of rocks, a benchmark plaque, and a ammo can containing the summit log books. It was cool with a lot of gusty wind up there. I could see almost all of the valley floor, Rogers and Telescope peaks, and other ranges in the distance. There were still a bunch of ladybugs crawling around the rocks at the summit.

View from the peak

Ladybugs on rocks at summit

It had taken me 4 hours 30 minutes to make it to the top. Around 3:30 PM I started back down. I noticed the bottom of my pack was wet and upon investigation one of my hydration bladders was leaking. The threaded ring the cap screws onto also screwed down on a hanger. If this wasn’t screwed all the way down, then the cap couldn’t be screwed all the way down. I lost about half my spare water which made me wonder if I was going to run out before getting back to the trailhead.

It felt like it took forever to get back down because I was tired. I’d check the map and realize each time I had only gone a quarter mile. I met four more hikers that were going up and by the time I reached the bottom they were right behind me coming back down. I finally returned to the trailhead around 6:00, so it took less than three hours to get back down. In all, right under 8 hours round trip. I’m not sure how much water I lost due to the leak, but I think I consumed about 4 liters on the hike.

Needless to say I was worn out and crashed early in my tent. I woke up at 10:30 PM and the altitude was bothering my sleep. I could feel my heart beating rapidly and I was having to breath through my mouth occasionally. I didn’t have a headache so I ruled out AMS. I don’t know if it was because I had exerted myself so hard or what, I finally gave up and packed up my tent to head down to a lower altitude. Of course when I got down lower there was a strong wind kicking up a sandstorm everywhere. I spent the night down at Emigrant and the wind finally died down after 2 AM.

Monday I departed for home. Well after passing through Panamint Springs I heard a jet roar overhead and later saw it flying over the valley. It was too far off to get any sort of photo, boo. On the way down highway 395 I saw a pair of C-17s flying parallel to the highway but didn’t get my camera out in time for those.

Mileage

9/27
4:35 PM   319,259  Fremont, CA
11:35 PM  319,638  Pearsonville, CA
1:31 AM   319,749  Stovepipe Wells, CA

Idaho: Solar eclipse 2017

[flickr: Idaho solar eclipse]

I figure I had better write about this before I forget even more about the trip! I was mildly interested in the solar eclipse this year, had finally heard enough people talk about how awe inspiring a totality is and decided to go check it out. I vaguely remember seeing a partial eclipse sometime, but I can’t remember if it was in Oklahoma or Texas, nor when it happened. For best viewing Oregon was the obvious choice, although the more I heard it was going to be insanely crowded up there. As an interesting coincidence, Facebook’s Prineville datacenter was right in the path of totality.

I had heard of some astronomy folks headed up to Idaho which stood a better chance of having clear weather, so that’s where I went. I knew hotels and campsites would be full, so I scoured maps for BLM or other public land to camp on. I vaguely wondered if I could stealth camp somewhere in Craters of the Moon park. It turns out BLM was well prepared for this and gathered a lot of information about campsites and areas under the eclipse’s path and also generated some nice maps.

Like most of my trips I did utterly no planning and at the last minute scrambled to find some eyewear. Amazon was all sold out (or things were recalled) of eclipse glasses. NASA recommended at least a #12 welding glass, and I only had a #10 in my helmet. I first went to Airgas to see what they had, thinking it would be easy to find something like #14, wrong. The best they had was #12, which I should’ve bought at the time. I tried my luck at Home Depot, Lowe’s, OSH, they were all sold out. I went back to Airgas before I left and discovered they were closed on the weekend. So, I departed without any specialized safety glasses, only my welding lens.

I had planned to go into central Idaho, and if the weather proved to be poor, divert over to Wyoming. I wasn’t sure what to expect as far as traffic delays in remote areas so I took an extra 20 liters of gasoline. The drive up was uneventful, I didn’t really encounter any heavy traffic. I spent the night at a rest stop somewhere along I-80 in Nevada. Driving through Twin Falls, the Perrine Bridge over Snake River caught my attention. It was a huge bridge over a gaping canyon with the river along the bottom. I stopped to take photos and two things caught my attention. First, the bridge handrail quivered and rattled like crazy whenever trucks went over it. Second, people used the structure beneath the roadway for BASE jumping. I saw 3-4 people jump, land next to the river, then start the long hike up to the park next to the road.

BASE jumper at Twin FallsBASE jumper in Twin FallsThe state had several travel advisories, mainly around Boise. There was a lane of I-84 closed which made traffic heavy, hard to say if it was eclipse related or not. Had I been smart I should’ve checked my maps sooner. I had driven almost all the way east to Idaho Falls, thinking that was the way to the mountains. Turns out I could’ve driven directly north from Twin Falls and saved myself a couple hundred miles. Not all was lost because I discovered EBR-I, the first nuclear power plant. It wasn’t too far from Arco, so I mentally noted to check it out tomorrow. I was surprised how close I was to Jackson, Wyoming, it was just over the border from Idaho Falls. I had last been there in 2010 when I made the long haul up from Austin. It was tempting to go visit again, but not this trip.

In McKay I stopped at a ranger station to check out the local info. A ranger came out to greet me, gave me a stack of maps and recommended a couple of places I could do dispersed camping. She recommended Borah Peak and a few areas in Sawtooth National Forest which would be directly in the path of the totality. I later found out Borah Peak is the highest mountain in Idaho, good to know if I ever want to come back to highpoint. All along the highway were homemade signs in peoples’ yards offering camping and RV parking spots, food, and water.

At the Borah Peak trailhead cars were already lining up along the side of the road. I parked next to a little creek and broke out the foldy chair. I really wish I had brought a tent with me, I was getting swarmed by these friggin little black flies that DEET did nothing for. More and more people were arriving by the minute. It was slightly hazy due to some wildfires but the forecast said it would remain clear tomorrow. I did some night photography and got some decent photos of the Milky Way.

Eclipse day

Monday was the big day. The partial eclipse started around 10:30 AM and would be total around 11:30 AM. Shortly after 10:30, it started feeling weird outside and I can’t put my finger on why. It felt like things had a slight red tinge to them. I didn’t even need glasses to look at the sun to tell it had started.

On the way back from the porta-potties I stopped by to check out a photographer’s setup where he had a few photo and video cameras set up taking time lapses. I mentioned I didn’t have glasses so he lent me a pair of really nice solar glasses and I finally got to see the partial eclipse happening. As it got closer to 11:30, it still felt weird outside. Now it seemed like my brain was telling me the shadows cast by things didn’t match up with the decreasing sunlight in the middle of the morning. I had my camera mounted up on a tripod with a 70-200mm lens ready to go.

As totality started it got very dim quickly, like dusk. It cooled off significantly, almost jacket time. People cheered as the moon completely covered the sun. It was really interesting to experience, although I didn’t have any great life epiphanies. I did notice a couple of stars come out near the sun which I wasn’t expecting. I spent the first minute soaking it in, then spent the remaining time shooting photos and videos as fast as I could. The 200mm did a decent job, but it was far from filling the frame. I cycled through many shutter settings not really sure what would work best. In the end I got two good photos and a video.

The stars came out as the sun was covered up

Standing there watching the big black sphere with the corona shooting out, I couldn’t help but think back to how it reminded me of the Spark from Super Mario Bros 2:

Artist rendition of the eclipse

It was a quick two minutes but still plenty of time to enjoy it. As the first hair of the sun peeked out from behind the moon, it was insanely bright. I got a brief blinding flash looking through the camera before I turned away. It warmed back up, and that was it.

After it was over I headed back out onto the highway, traffic was quickly picking up from everyone leaving the mountains. There were lines of traffic through small towns like McKay and Leslie as police were directing traffic at intersections. Locals were sitting outside in their lawn chairs watching the spectacle rolling through their town. First thing I did was head back out toward Atomic City to visit the EBR-I museum.

EBR-I museum


Experimental Breeder Reactor I was the first place where electricity was generated from atoms, enough to power its own building. It was completely open to self guided tours, you could wander through the control room, stand on top of the reactor core, go inside some of the heavily shielded repair rooms, and see the various supporting machinery. This reactor also proved it was possible to produce plutonium, and thus it was also the first place electricity was generated from plutonium.

Inside the blanket repair room

The “core blanket maintenance room” in the basement was sort of spooky to be in. The walls and door were 3 feet thick, requiring pry bars to move the door to get in. This was where bricks of shielding material could be removed directly from the reactor core, moved into this room where they could be put into lead casks and wheeled out. The windows were also 3 feet of layers and layers of leaded glass, so huge lights were in the room to compensate for the dimness. A big steel door is all that separated the room from the reactor core next door. My photos don’t do it justice, this is where I wish I had something that could do 360 degree photos. Clearly this room saw a lot of radiation but had been decontaminated. There were numbers scribbled in markers all along the walls, I’m wondering if they were some sort of radiation measurements.

The museum was a great accidental find, so I’m not upset at the extra milage. On the way back I stopped by the Craters of the Moon National Monument. The park was absolutely full so I didn’t get to explore much. The entire area was a huge lava bed and was certainly out of this world. There was also no chance I could’ve camped here anywhere.

In the middle of the night driving back through Nevada, I almost ran out of gas. I had taken a nap, was rocking out to my stereo and hadn’t paid any attention to my fuel gauge after leaving Idaho. I had just enough to make it into Sparks, oops. I spent the rest of the night at another rest stop and finished the drive home Tuesday.

Mileage

8/19
7:08 PM   315,488  Fremont, CA   8312.2 hr
9:46 PM   315,651  Gold Run rest stop
8/20
12:28 PM  315,819  Lovelock, NV
2:28 AM   315,972  Battle Mountain rest stop
8/21
7:51 AM   315,972
10:07 AM  316,067  Wells hwy 93 N
1:20 PM   316,258  Raft River rest stop
2:28 PM   316,322  Blackfoot, ID
10:51 PM  316,435  Mount Borah, ID
8/22
7:27 PM   316,640  Twin Falls, ID

I’m fresh off of two medical classes in August, first the NOLS Wilderness First Responder course, then a two day “Direct Action Response Training” by Dark Angel Medical. The DART course went over how to use a personal trauma kit (a/k/a individual first aid kit, or IFAK) and responding to immediate life-threatening events, such as a gunshot wound, stabbing, blast, or some other serious accident. I’m a believer in the saying “if you learn how to put holes in people, then you should learn how to patch holes.”

DART was hosted by the San Mateo County Sheriff’s Office, so about 3/4 of the class of 26-something people was either personnel from various sheriffs agencies, SWAT, police, or correctional officers, which was sort of intimidating. The rest were civilians, concealed carry holders, and/or private security. The instructor was named Ross, a former Navy corpsman, now a paramedic in San Bernardino.

There was a lot of overlap between the WFR and DART courses, such as patient assessment, wound treatment, splinting, and environmental issues, but it was far more compressed than the 10 days of WFR training. There were also a lot of differences, namely in treating life threatening hemorrhages and getting an open airway over everything else in an urban, tactical environment. This followed the military’s tactical combat casualty care (TCCC) guidelines, e.g. stop the threat to you and your patient, get them to cover, stop the bleeding, maintain an airway.


The assumption was that you would be in an urban environment and higher level care would be available relatively quickly, compared to the WFR training where we were taught help may be hours or days away. As such we practiced a lot with tourniquets. Each one of us had a CAT tourniquet and during class Ross would randomly call out a limb and we had to apply the tourniquet as fast as possible and check our pulse to ensure it worked.

I was surprised how quickly we were supposed to resort to TQs. If you can’t stop heavy bleeding with direct pressure to the wound and it’s on an arm/leg, immediately put a TQ on the limb. In WFR we were taught a TQ was a last resort after direct pressure, compression bandage, and wound packing, which makes sense because a TQ needs to be off in a few hours.

Here, if a TQ (or two) didn’t stop the bleed on a limb, or it was an area such as the hip or shoulder where a TQ couldn’t be applied, then start packing the wound with hemostatic gauze, and put a compression bandage (e.g. Israeli bandage) over it to hold pressure on the gauze, thus keeping pressure on the arteries/veins against a bone. After practicing packing a wound on a mock limb, I realized that properly packing gauze into a big wound takes quite a bit of time to do (and I’m told will be considerably painful to the patient, who might fight it), whereas stopping the flow of blood with a TQ was very fast.

I learned a several interesting things about tourniquets. While ideally they shouldn’t be on more than two hours before the next level of care, in some extreme cases they have been left on 16 hours without loss of limb. If you can see the wound, it’s okay to put a TQ on a few inches above the wound (arteries have elasticity and may retract into the body), otherwise it’s equally okay to just put the TQ as high up on the limb as possible too. This was something I was confused about as I had read conflicting ways to apply them. Once a TQ is on (more than a couple of minutes), never take it off or relieve the pressure, as you’ll be releasing blood clots and alkaline blood into the system which could cause an embolism in the heart/lungs/brain, or worse. Lastly, when using a CAT tourniquet which uses velcro, be sure the end is secure. When it goes around a leg it’s very easy to snag the tab and undo the entire tourniquet. For this it may be better to use CATs on arms and SOFTT-W (which uses a strap) around legs.

I practiced some with a SWAT-T tourniquet, which is basically just a long strip of 4″ wide rubber. I’m told the idea originally came from a Detroit SWAT officer who cut the innertube of a bicycle to improvise a TQ when he was hit. The thing needs a lot of practice to use, as it’s very hard to put on one handed, keep it really tight, and keep wide enough. It works, but I’d want something better.


The initial patient assessment was also slightly different than wilderness, instead of ABCDE, here it was HABCDE (H for hemorrhage) with an emphasis on immediately performing a much more aggressive blood sweep on the body to look for bleeding or holes. Granted, in both courses we were told the sequence isn’t set in stone, do what needs to be done in whatever order is most important, just make sure all parts of the assessment are done. Spinal control wasn’t as of an immediate concern in the D part of the assessment as wilderness, compared to stopping bleeding and opening an airway. It was explained with a brutal bit of logic, “they may be paralyzed after, but they’ll be alive”, as opposed to spending time to stabilize the spine while they asphyxiate.

Decompression needles for a tension pneumothorax seem to be a negative thing to have on you if you don’t have higher levels of training/certification. Even if an off-duty paramedic shows up, using the needle while they’re off duty opens even them up to liability. However nasopharyngeal airways are not considered intrusive and can be inserted by a Good Samaritan rescuer to keep an airway open.

Further on the train of thought that emergency care was quickly available, we were taught to splint broken bones as found even if they were compound fractures. I did learn a nifty figure-8 splint made out of triangle bandages to support a broken clavicle.

One thing that was good about the class was the “graphic” images and videos during the lecture. I guess I got over any squeamishness I had. It’s one thing to have a chest wound, flail chest, or femoral bleeding described in a textbook, it’s another thing to actually see one to really understand it. A couple of short video examples showed how quickly (less than a minute) somebody could be hit with gunfire or inhale toxic chemicals, degrade and be well into deep shock or unconsciousness without any sort of help available before dying.


Beyond first aid, the DART course also spent time on how the body reacts during a life threatening event, which I found interesting. Individuals may fight, flight/run, posture, or completely submit to a threat. As heart rate increases due to a fear/stress response, critical thinking and logic is severely impaired. Thus, a person with a better cardio conditioning can stay level headed longer because their pulse isn’t skyrocketing as fast. Not only does the body dump adrenaline during a flight/fight response, it also dumps the body’s entire supply of glucose, and ramps up production of cortisol which helps blood clotting. Also it’s common for people to lose bowel control and soil themselves in a high stress situation, something that’s not talked about much. So, if you’re going on patrol, go to the bathroom first.

In the last couple of hours of the second day we went through several quick scenarios. This was pretty familiar from the WFR training. Some of us were sent outside, the rest were inside with a mock injury (no moulage here), go in and help them. Here several of the examples involved applying tourniquets. We also practiced a Hawes carry, which was a pretty quick and easy way to pick somebody up onto your back like a backpack and carry them, while still having an arm free to work or shoot back.


Overall I really liked the class. If you’re into shooting sports, definitely take the DART class and learn how to use a medical kit/IFAK. Even if you’re not a shooter, it’ll help prepare you for other serious injuries around the home or on the road. Several of the “saves” mentioned on Dark Angel’s website are from vehicle accident injuries where somebody with the right mindset was able to use a med kit to stop bleeding on some poor soul on the road. WFR was one of the “what to do next” recommendations beyond a first aid class. If you have the time, certainly do both, they were very interesting. While there was some overlap, each class has a focus on very different things.

Yosemite with more cowbell

[flickr: Hetch Hetchy trip]

Ever since that One Time in 2005 in Colorado where a bear tried to nose their way into my friends’ tent at night while they were still inside, I’ve been leery about camping in the forest. Usually I don’t have a problem with wild critters, I’ve spent many nights in Death Valley surrounded by howling coyotes, and I didn’t even think about bears when I camped in Modoc Forest recently.

Yosemite on the other hand has a reputation for bears, there are warning signs everywhere, from the cabins in Half Dome Park to the wilderness trailheads. “Use bear canisters. Keep food out of vehicles and tents. Lock things up.” So I was a bit apprehensive when I decided to set up my tent in a meadow in Stanislaus Forest along forestry road 1S20 right outside the entrance to Hetch Hetchy last Thursday.

I knew there were cattle in the area, at least on the other side of the road down a ways but there was a fence and I didn’t think much of it. I carefully scouted my camp site and seeing no problems set up my tent. There were some critter noises at night, mostly bats chirping and birds.

Around 2:30 AM I heard in the distance some snorting, stomping, and tree limbs snapping. Something big was there. This spooked me, so I grabbed my flashlight and shone it at the ridge beside me. After a minute of more noises I saw two eyes staring back at me, probably 100 feet away or so. I made a bunch of noise, clapping, hitting my camera tripod with a stick, but whatever it was it didn’t move.

More snorting, stomping, and tree limbs breaking. This time when I looked I saw three pairs of eyes staring back at me in the dark. I made more noise, nothing. It was around this time I started to wonder if these were cattle, because I don’t think bears travel in packs, and cattle just don’t give a fuck about anything. Then I heard a faint cowbell from the ridge. I finally realized these indeed were cattle, they were coming over the ridge into the meadow where I was staying. Several of them had cowbells on, clang clanging in the night. About 10-15 head walked by my tent to a clearing, where they apparently settled in for the night.

I figured a herd of cattle with bells on around my campsite would scare anything else off (or at least be a tasty prey), so I was finally able to fall asleep relieved. In the morning they were up grazing around my tent so I got to watch them as I was laying there. A few were curious but ran off as soon as they saw me move. [Cowbell video]

Hetch Hetchy

The point of camping out in the forest was that I wanted to go explore Hetch Hetchy lake. I had only recently heard the back story about it, how it was a large granite valley like Yosemite Valley, but it was dammed up to create a reservoir for San Francisco’s water supply.

There wasn’t any camping within the reservoir area unless you were a wilderness backpacker, thus camping in the forest. It was about a 9 mile drive from the entrance gate, down into the valley, before reaching the dam. It is a pretty place, just like Yosemite Valley with huge granite walls, just full of water.

There are several hikes around the lake, some are day hikes, others are multi-day backpacking trips to some of the other lakes and meadows in the area. I opted to hike out to Wapama Falls, which was a few miles up on the north side. It was pretty hazy out due to the two larger wildfires in southern Yosemite. By afternoon the wind was picking up and it started to cool off. Overall it was a nice hike.

Originally I had planned to stay out until Saturday, but after getting tired from hiking and not sleeping much I just opted to come home Friday night.

NOLS_WM_BADGE_CREDENTIAL-WILDERNESS FIRST RESPONDER

The always self-sufficient side in me has always been fascinated by wilderness medicine, how do you care for somebody who’s hurt/sick when you’re hours or days away from care? How do you improvise what you need to treat that person and make it possible to move them? When I was growing up in a rural area, we didn’t have 911, and a sheriff or ER could easily be 30+ minutes away; that was even after you got back to somewhere you could call/send somebody for help. This is part of what taught me it’s important to be able to take care of yourself.

Today I frequently go out on my own on roadtrips or hikes that put me hours into the middle of nowhere, could be west Texas, the Nevada desert, or the side of some mountain in Washington. Very often there’s no cell service, and while I have an amateur radio license and access to a transceiver that could reach dozens of miles out, it’s only useful if I know the area repeaters and if there are people listening that could help.

I learned about the NOLS Wilderness First Responder course years ago and it seemed very interesting because it went way beyond patching boo-boos and doing CPR, things taught in a basic first aid class. It covered all sorts of illnesses and problems that could happen in the backcountry, broken bones, wound management, head+spinal injuries and more. Further, it wasn’t just a textbook work, it was a hands-on course to practice doing these things. Unfortunately it was 10 days long and I never had (or put aside) the time to go to travel and take the course.

After my recent work sabbatical I dusted off the NOLS website and signed up for the WFR course here in California. One thing that bothered me from the course outline was having to pretend being a patient and using moulage/fake makeup. I totally understand and get how it’s necessary for the experience (more so now after actually doing it), but I was pretty meh about it up front. Even as a kid I never was a fan of make believe, costumes, or Halloween.

The class in San Francisco booked quickly and I signed up for the one in Sausalito. This was a long haul to make every day across the bay from Fremont, so I got a cheap motel in Mills Valley. The classroom was actually at Point Bonita YMCA, right on the coast near Golden Gate in the Marin headlands. Being August (Fogust) I expected it to be cold and foggy, and turns out it was the whole time. The weather upped the realism because we were frequently wearing multiple layers, snug jackets, and big coats, things we’d normally wear in cool environments, all which had to be dealt with during scenarios. Outside of the fog and drizzle, we had the Golden Gate Bridge and the Pacific Ocean as our backdrop to our outdoor classes. You couldn’t ask for a better setting around here.

Our instructors were Ryland and Sheri, and there were around 23 (?) people in the class. They all had varied backgrounds, such youth group leaders, park personnel, guides, and a few of us engineers who like the outdoors; all were mainly doing it for personal enrichment, some as a job requirement.

After some initial classroom time on the first day, we headed outside for our first scenario. If memory serves correctly it was how to size up the scene, approach the patient, and go through the ABCs. Another scenario worked up to head-to-toe assessments, getting vitals, and SAMPLE history. I had read a good hunk of the textbook in the months leading up to the class, but actually doing my first assessment on a real person I went into full on dummy mode and forgot everything I had read.


Each day was a combination of going over a topic in the classroom or outside in a group huddle, and going through 2-3 scenarios. For scenarios a group of students would be selected to be patients, go outside and be briefed on a story of their injuries and symptoms, then go lie/sit down somewhere and wait to be rescued. A few dabs of moulage makeup was usually used in each scenario to simulate bruising of a limb from a sprain/fracture, landing on the back, cyanotic lips, infection, rashes, and/or abrasions on faces or hands; then concealed under clothing for the rescuer to discover. Nothing outrageously gory at all, just something to help visualize the signs.

Rescuers would remain in the classroom until they were told it was time to go, given a very short summary on what happened (e.g. friend was slack lining and fell, somebody wrecked their bike, or sometimes “you just found this person”), and sent out to find the patients. At first we usually paired up two rescuers to a patient, but over time we also did a lot of solo rescues, and then got into full teams of rescuers. (Many of our mock scenarios happened at Yosemite, so watch out for that place. We also had a few oddly freak skydiving accidents for varieties sake resulting only in broken fingers, what a weird sport.)

Each time we would size up the scene, approach the patient and ask if we could help, go through our ABCDEs to check airway, breathing, circulation/bleeding, decide if we needed to stabilize their neck/spine, expose the injuries. Next we did a full, thorough head-to-to exam looking for any injuries/pain/tender areas, got a set of vital signs, a SAMPLE history, more vitals to find trends, and dug into any interesting points. Depending on the injury we’d try to do treat or immobilize the patient, decide if they needed evacuated, and come up with a verbal SOAP note to present. The SOAP was a special format of report we’d call into a search and rescue group, other rescuers, or otherwise higher level of care. (S = Subjective, information from the patient, “what could be lied about”, OPQRST details; O = Objective, facts from vital signs and observations, “the truths and facts”; A = assessment, what we thought was going on, what we did; P = plan for the patient, including long-term [e.g. overnight care]).

After each scenario we’d get together both as patient+rescuer(s) and the class as a group, go over what went well, what we missed, go over questions, and practice presenting a SOAP note to the group based on what we just went through.

We learned how to safely move people even if we were by ourselves. Once I saw where to grab and how to pull, it was no problem to move even my bigger classmates. If we suspected there was a possibility for a head/neck/spinal injury we’d control their head until we could check them out further. We frequently practiced rolling patients onto their sides for examinations, putting them on pads, putting them into recovery position in case they were to vomit or we had to leave them for help. Later we got into learning how to pack them in various litters for carrying them out as a team.

We learned how to do focused spinal exams to look for any injury/tenderness to the spine, check for things like tingling/numbness, sensation/motion in limbs, and if nothing negative was found, cleared to discontinue holding the head and letting the patient move around. I found out this is something specific to wilderness medicine protocols, an urban EMT wouldn’t do this.


Even when I was acting as a patient I found the scenarios very useful. For instance if in a scenario I was afflicted with a high altitude cerebral edema (HACE), I became much familiar with the signs and symptoms associated with HACE because I would pretend to be irritated, say I had a pounding headache, didn’t sleep well last night, pretended to be nauseous, and had ataxia which made it hard to walk.

As time went on I got more comfortable acting as a patient. Some classmates would really get into it and ad lib some awesome reaction, pains, fake vomiting, or combativeness. It was a tremendous help in the learning process because we had to react to what was happening, such as rolling them on their side immediately if they thought they were going to vomit or choke, then get back into our assessments. Based upon how we found them we may had to change up our priorities. There were often a number of symptoms and things to remember, sometimes I’d forget a key thing to present while they did their assessment so it’d made me feel bad that I didn’t give my rescuers a full shake down.

In the classroom we covered a lot of topics over the ten days. For each topic we dived in a few hours, went over what was happening in the body, what signs and symptoms a given injury or illness would present, how to tell if they were minor or severe, treatment options, whether to evacuate or immediately evacuate the patient to get to higher level care. I found it most useful to write down everything onto my workbook during class, even if it was exactly what was already on the same page, because it made it sink into my head better. Ryland and Sheri would take turns talking about a topic, and they did a great job of teaching about it. They added in personal experiences, answered a ton of questions, and throwing in copious amounts of humor to make it very engaging. Doing scenarios after class time really tied it all together and made it real.


Later into the week we got into larger scale rescues where 4-6+ people worked as a team, either on a solo patient or a group of patients. It was a bit chaotic at first as people settled into who would do what, keeping the leader out of the direct action so they could lead, and deciding on treatments.

Rodeo Beach

One memorable mass casualty scenario was a “beach rescue” where we had multiple patients on the beach (on the actual Pacific Ocean at Rodeo Beach), and multiple rescuers. The moulage was kicked up considerably with all sorts of brutal injuries, patients were screaming and running around, which made it all very real. (Bystanders on the beach had to be told this was a training exercise.)

A few students were designated as incident commander, assistant, and gear keeper, and to organizing the rest of the rescuers. As an added twist a few of our classmates selected as patients also spoke Spanish, so they decided to throw us a curve ball by only speaking Spanish during the rescue. This was a considerable difficulty with my very limited Spanish, fortunately my partner could speak Spanish and she took on communicating with our patient. There were a few other students who could also speak Spanish, so our incident commander also took care of organizing them and sending them where their language skills were needed. Between getting our patients out of the surf, watching the tide, keeping them and ourselves dry and warm, assessments and treatments, frequently communicating our patients status to the incident commander, requesting gear, re-prioritizing who gets evacuated, and translating the Spanish there was a lot going on!

Another large scale rescue happened at night. We were divided into groups and sent out to different points of the park. We didn’t know when/who/where our patient would be or what we’d find, but it became quickly apparent as things unfolded. We took our day packs with us and had to treat our patient with whatever gear we carried, so there was a good amount of dumping packs and improvisation going on. A few concerned bystanders wandered by on the trail during all of this as our patient was screaming in mock pain so I had to give them a thumbs up that we had it under control. As part of the story we were lost and had to wait until 9:30 PM or so for somebody to find us. It was cold, windy, and dark, this was to teach us what it’s like to be with a patient for an extended amount of time and tend to them long term. While we debriefed afterwards in the nighttime I learned during a tib/fib break I did a poor job by only deciding to splint the lower part of the leg below the knee of our patient instead of the entire leg. The disappointment of our instructor upon inspection was palpable because it wouldn’t have worked. The next morning we got together again, dumped all of our gear and tried to make a better leg splint out of empty packs. By using three empty backpacks and some rope, it worked out a lot better than the night before. By far it was all certainly a learning experience!

Leg split made of backpacks


As a class we did a pretty good job of bonding with each other. We learned how to help each other, divide up the workload of patient care, and give feedback to each other on what we could do better. By the end we had taken so many vital signs and did head-to-toe exams on each other, I think we knew each other better than our own doctors did. I think we wound up going through at least 20 scenarios including the two big team exercises.

For the end of the course we took both a written test and did a practical exam. The practical exam was a relatively simple dual-rescuer, single patient scenario where there were a couple of things going on with the patient to treat and manage. After all of the scenarios I had been through I was pretty confident about it, but there were a set of exam criteria that we had to get right or we’d have to re-test which made me nervous. My partner and I passed, hooray!


I would wholeheartedly recommend this course to anyone who ventures outside. I had a great time and feel like I learned quite a lot. Reading the textbook was one thing, but it was a whole ‘nother experience to constantly practice scenarios, examinations, and making mistakes. The NOLS website also has a good set of case studies, test question banks, and videos to review. I’ve learned to love how versatile triangle bandages and Ace elastic bandages are, I will always carry those in my packs!

It was stressed that our skills would deteriorate over time, and we were urged to frequently practice doing patient assessments, consider volunteering our time to an organization, search and rescue team, fire department, or even just taking vitals at a health fair to help keep our skills up to date.

I don’t know when or where these skills will come in handy. I feel much more confident in walking up on something unknown, and even if I can’t do much of anything, at least assess the situation and get information to other rescuers.

« Newer Posts - Older Posts »