Mono Lake tufa
[photos: flickr – Eastern Sierra]
[photos: flickr – Mono Lake]
The Tioga pass through Yosemite finally opened up in the latter part of May, so I wanted to go check out things on the other side of the park. It’s a shortcut, otherwise I’d have to go up to Tahoe then head south, or down to Bakersfield and back up (practically a whole Death Valley trip). The goal was to check out some of Yosemite, Mono Lake, Mammoth, and maybe White Mountain Peak.
The whole trip was beset with bad luck, which made things interesting to say the least.
The bad:
Friday: On the way over the Altamont pass heading out of the Bay Area, a motorcycle wreck had really backed up traffic. It was the hottest day of the year so far, and sitting in the heat on the road the truck started overheating. I turned off the A/C and turned on the heater on full blast with the windows down to get things under control. Then they closed the freeway to land a medi-heli in the middle of the lanes to evacuate the poor soul. It was after 6 PM before I got to Tracy, putting me arriving way after sunset and trying to find a dispersed camping spot in the dark. I gave up and returned home.
Saturday: Got to Mono Lake. Drove down Picnic Ground Road, went through a narrow spot lined with brush and put several scratches from bumper to bumper on the side of the truck
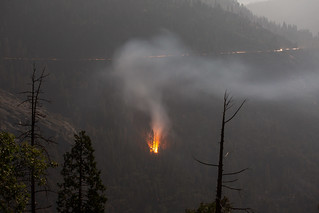
Sunday: The Lions Point fire west of Mammoth made the entire mountain and surrounding valley smokey. At one point when I stopped, it was snowing bits of white ash. So much for hiking here.
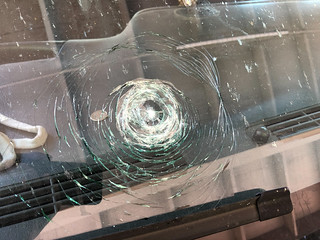
Busted windshield
Monday night: driving home on westbound 580 outside Livermore, something off of a semi-truck slammed into my windshield, breaking it. I don’t know what it was, and the truck was two lanes over. It left a nice pancake sized shatter which was spongy in the middle, meaning it almost went all the way through.
Tuesday morning: I had noticed lower oil pressure after driving the White Mountain road, and was keeping an eye on it and oil level. When I started the truck this morning, the oil pressure read zero and it immediately threw a “low oil pressure” alert. Oil level seemed fine, so I’m suspecting the sending unit. Also on Tuesday, the property management said they’d need access to my apartment for fire alarm checks. This was the whole reason I came back Monday night, so I could be here. They never showed up, and I noticed on the letter they said “Tuesday June 25”; the 25th was Monday, so I have no idea if they did their work yesterday. (The alarm never went off).
So yeah. The universe was conspiring against me.
The good:
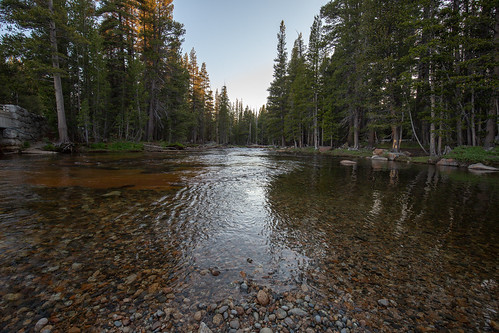
Tuolumne Creek
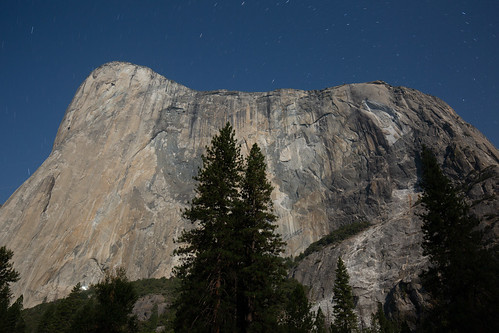
I got to Tuolumne Meadow in Yosemite right at sunset on Saturday, perfect timing. Yosemite is beautiful as ever, so I ran around snapping pics and recording video. I continued on to Mono Lake, to find a place along one of the forestry roads for some dispersed camping. The first place was just northeast of the visitors center next to Lee Vining Creek. I wasn’t the only one camping there, I noticed two other vehicles on the other side of a group of trees. The creek was running and made a pleasant sound all night long.
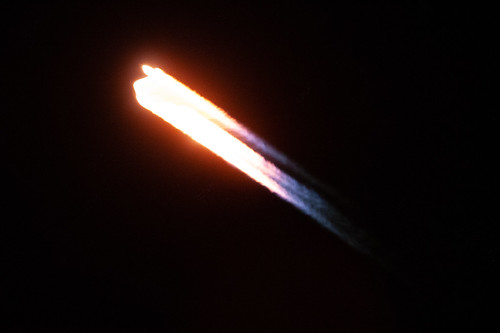
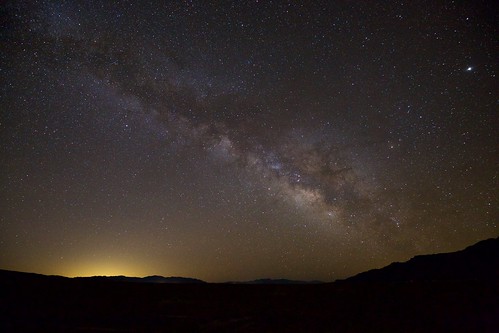
Shooting star photographs was a bust, I had waited so long to make this trip that it was almost a full moon again. Between the moon setting at 2 AM and twilight happening around 4 AM because of summer, there wasn’t much time to do time lapses of the Milky Way. At least Mars, Saturn, Jupiter, and Venus were all visible which was a nice treat.
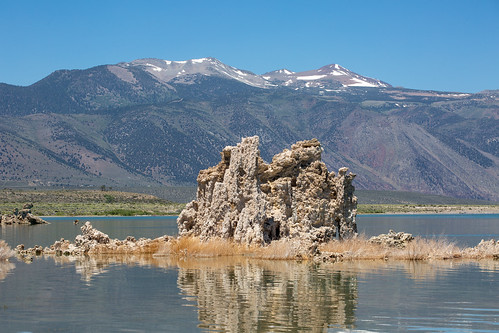
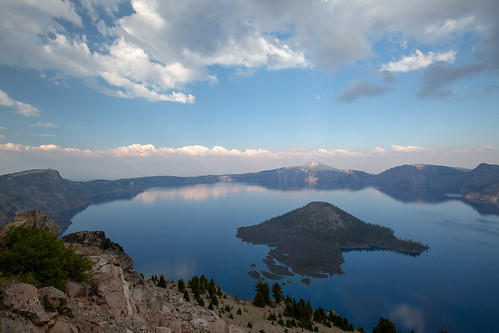
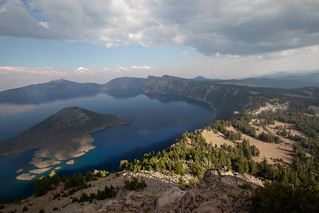
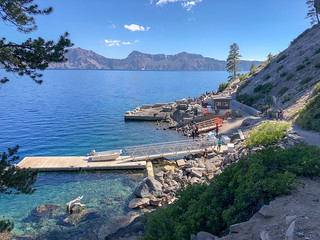
Tufa formation at Mono Lake
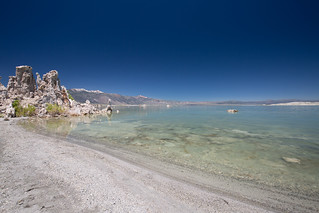
Because I was up all night I was struggling to try to sleep in after the sun came up and it started getting warmer. It turns out the Tioga Gas Mart by Lee Vining actually has a pretty decent deli, along with outdoor seating and a lake view. I headed over to the South Tufa Area at Mono Lake to look around. Mono Lake is also the namesake for Facebook/OpenCompute’s Mono Lake servers that I worked with before I left. The water was surprisingly clear and blue-green which made for some nice photos. The exposed tufas along the shore were created when the lake level was much higher, when underground freshwater springs brought in calcuim that mixed with the lake water, which formed calcium carbonate pillars.
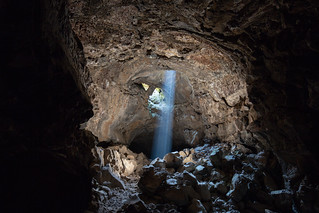
Next I headed down to Mammoth Lakes. It turns out there was a wildfire just east of Mammoth which blanketed the entire area in smoke. When I stopped at Minaret Summit the sun was blotted out by brown smoke and it was actually snowing a bit of white ash. I continued down in the valley to Devil’s Postpile, because I had no idea what a postpile was and why the devil made one!
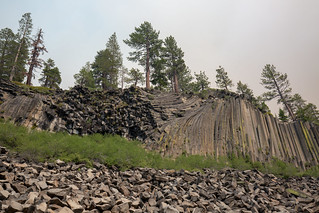
Devils Postpile
The postpiles were hexagonal columns of basalt that formed when lava pooled behind a glacier in the area. As the lava cooled they formed a tight group “posts” a few dozen feet tall. Many had collapsed, but indeed the remaining basalt did look like a pile of posts.
Down in the valley there wasn’t nearly as much smoke. This is also where the John Muir and Pacific Coast Trails ran though and a common place for hikers to take a break. I also noticed at the Mammoth ski lodge, they have a gondola that will take you to the top of Mammoth Mountain. I’d like to try that sometime in the future, this time it would’ve just been too smoky to see anything I think.
After dinner in Mammoth I headed back up to Mono Lake. I found a different camping spot this time further south and it was pretty nice with lots of space and a view overlooking the lake.
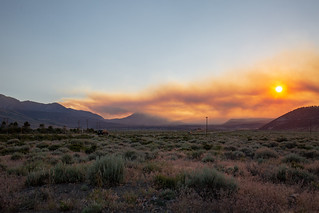
Smoke from the Lion fire
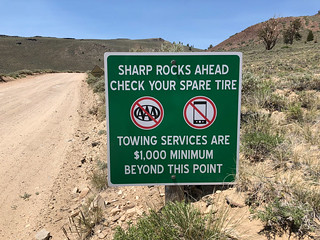
White Mountain Road warning sign
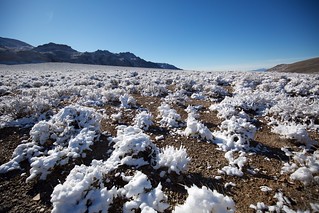
Monday, I headed south again, this time to White Mountain Peak. Or at least to the locked gate leading to the peak. I wasn’t prepared to hike it, but I did want to go check it out. I learned on the way up the mountain there was a “Ancient Bristlecone Pine Forest”, full of the oldest trees in the world; going back thousands of years. Worth checking more next time around. Beyond the visitor’s center, there was an ominous sign on White Mountain Road warning of no AAA service, no cell service, and that a tow beyond this point would be a minimum of $1,000.
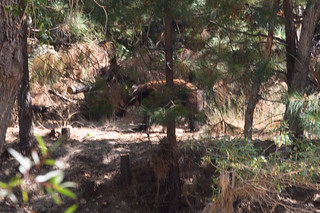
Of course I proceeded onward down the 16 miles of rough dirt road to the trailhead. This was some slow going and I was trying not to get bounced around. The road went up past 11,000 feet and above the treeline, with just nothing but fields of rock up above. Near the trailhead I noticed marmots started running around in the fields by the road. When I got to the locked gate where the trail began, there were a few other vehicles parked there. More marmots were running around and several were getting shade from the parked vehicle. The altitude here was something like 11,790 feet and I was getting lightheaded just walking around taking photos. After several minutes of this I headed back down the mountain.
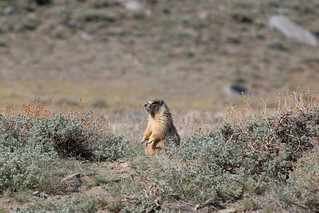
Marmots at the White Mountain Peak trailhead
Getting down took even longer than driving up, I was seriously getting bounced around on the road and had to creep down it. There’s no way I’m driving that again unless I have something meant for off-road driving. This is where I noticed my oil pressure had dropped, so I was starting to keep an eye on it.
After dinner at the Gas Mart again, I headed back home through Yosemite. It was all pretty uneventful until I got outside Livermore on 580. This is where the unknown object hit my windshield and made one hellofva bang.
The next morning, Tuesday, is when I discovered the problem with the low oil pressure.
It’s now Thursday afternoon, I just got a new windshield put in. I tried replacing the oil pressure sending unit yesterday, discovering it’s way the hell at the back of the engine and going to be a real pain to replace. I may give up and let a mechanic try to do it for me instead.
Tags: sierra, yosemite
