A series in yak shaving…
I’ve been working on vintage equipment all summer, mainly from bringing back old computers and media back from Oklahoma with the intent of trying to get the systems running again like an old ’67 Mustang and/or retrieving the data for memories sake.
I’ve quickly learned if it’s not an old capacitor going up in smoke, it’s a good chance a drive belt of some kind has worn out and broke or lost tension. I present four case studies:
TRS-80 model 4
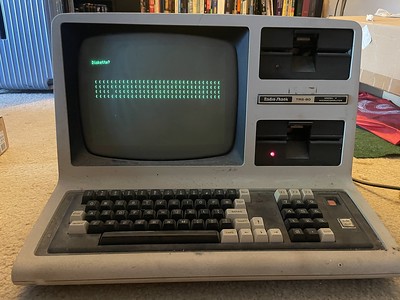
I naively plugged this thing in before reading any sort of restoration guides and within a minute a RIFA power filtering capacitor went up in smoke. A new, modern power supply made by a TRS-80 hobbyist later, it was running.
Problem is, disk 0 lights up but will not spin the disc at all. Based on what I’ve seen of similar IBM XT-era full-height floppy drives, there’s probably a drive belt on the bottom of the drive that has failed. I haven’t seen in anyone’s documentation if it’s some sort of direct drive or if it indeed has a belt, and I haven’t yet taken it apart again to see. Fortunately there’s a nice Youtube video on how to clean and lubricate TRS-80 drives which should be pretty handy in getting it going.
80286 and ST-225 hard drive
Broken split drive belt
[photos: flickr – ST-225 repair]
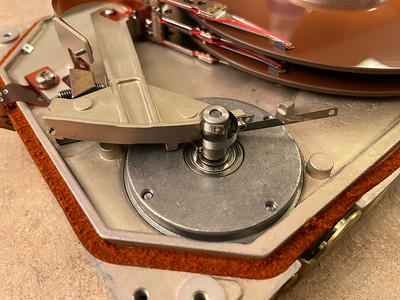
This was our first IBM clone at home from the mid-1990s. It boots, but the 20 megabyte (!) Seagate ST-225 MFM hard drive isn’t readable. It’s motors are quite loud so I’m pretty sure they’re spinning up and the stepper motor moves around a bit. I tried giving the stepper motor a drop of oil, but that didn’t help. I don’t really expect any data of interest on the disk, maybe some old Lotus 1-2-3 spreadsheets or Windows 3.0, but now I want to try to save it. As a last ditch effort I opened the drive up to see if there was anything obviously wrong like scratched platters before I gave up or decide to send it to a data recovery place.
When I opened it up, I immediately noticed a band that connects the stepper motor to the read/write arm had snapped off its end that secured it to a tiny peg. Without it, it couldn’t seek the heads across the platter. I had also noticed some light chips on the outside of the platter. I suspect this all happened from it’s 1,700 mile road trip and had I turned it on before I left it might have actually worked.
This set me out on a crusade to replace that little piece of metal band. Googling around I discovered it’s called a “split-band drive belt”. It’s metallic because it’ll stick to a magnet I have, yet it’s very flexible. At first I thought it might be some sort of mylar, but given it’s job to constantly wrap around the shaft of the stepper motor and pull the read/write arm around, I can’t imagine it to have much, if any, stretch.
I thought a strip of aluminum can might work, but after cutting it down to roughly the right size it’s clear it isn’t very flexible and wants to stay bent. I don’t have much confidence that would work, but who knows.
I even showed the problem to a semiconductor machinist friend if he had any idea what kind of material it was or what I could use to replace it with. He drew a blank, but suggested maybe the coil out of a thermostat or thermometer could work. The other alternative would be to buy another ST-225 drive off eBay, disassemble it, and steal the part from it. Those are going for over $50 + shipping now, whereas a thermometer at Wal-Mart was $11.

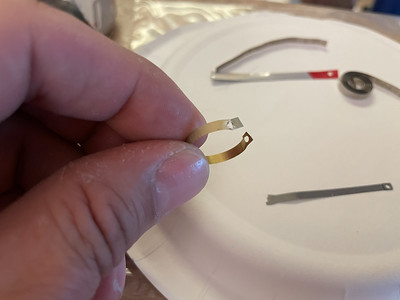
I discovered the temperature coil spring or whatever you call it is actually quite stiff, more so than aluminum. It was however almost exactly the same width as the broken band, so that was neat. The thermometer actually had a secondary needle, for relative humidity. This smaller coil appeared to be some sort of brass, it was the right width and appeared to be very flexible! Winner!
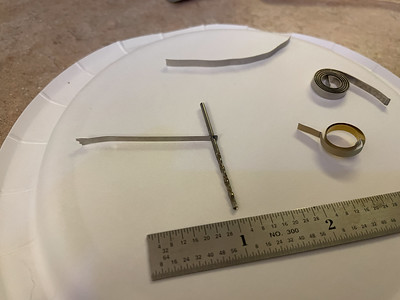
Original, aluminum, bi-metal, and brass
Because it was a smaller coil, maybe 3″ when flattened, I had only enough material to make one replacement band with it. The holes in each end of the original were 1/16th – 5/64 of an inch. I rigged up a jig to hold the material, drilled one hole before the belt in my cheap drill press snapped. And the spare too. I drilled the last hole by hand because I was in an excited rush, which was a bad idea because it was not a smooth hole.
Of course another problem with this approach is that the thermometer metal is designed to expand and contract, so it remains to be seen if this is a problem with such a short piece that could cause it to not align with magnetic tracks.
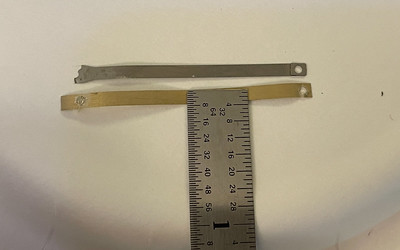
The original and newly made band
When I went to put on the replacement, I tugged just a bit too much trying to get the band over the last post and the ragged hole ripped out. Crap. So now I have to find replacement belts for my China Number One jeweler drill press and another thermometer to sacrifice.
I catch myself browsing for ST-225 drives on eBay, I may say screw it and get one for parts if it too hasn’t already suffered a similar fate.
Drill press
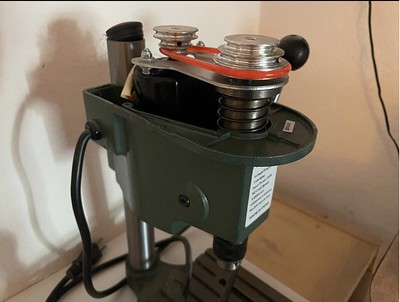
I bought the worlds smallest drill press to use for my various projects in my apartment. It’s great when I need it, very quiet, I can set it on the kitchen counter, poke some holes, and stick it back on the shelf when I’m done. It’s drive belt is a glorified red plastic rubber band.
In the process of drilling holes for the hard drive repair, it snapped, followed by the spare belt. It took me a while of Googling to find replacements for it because my unit’s part number wasn’t turning up anything, but I eventually found a jeweler supply shop that had some that fit. So that is at least one problem I’ve completely solved.
QIC-80 tapes
[photos: flickr – QIC-80 repair]
By some small miracle we found three of my old QIC-80 backup tapes while cleaning out the house. These are very important to me because they have backups of my old BBS I was running in 1995 and would very much like to get that data back.
This was a whole side yak shaving quest because Colorado QIC-80 tape drives like I had piggyback off a floppy disk controller. There were some external units that connected to a parallel port that the Internets said didn’t work too well, and wanting to have the greatest chance of success, bought an internal drive like I had before. The problem was I didn’t have a single thing anymore with a floppy disk controller, not even the various mini-ITX boards I had. I don’t think I ever even found a PCIe floppy controller either, just an ocean of IDE interfaces. So naturally I eBay’d a 486 system. Ironically the 486 I wound up getting just happened to have a Colorado tape drive in it, so now I have two!
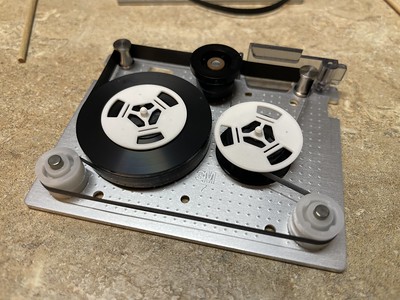
Being the excited person I was, after getting Windows 95 and the Colorado Backup software installed, I stuck in a “new” QIC-80 tape I also eBay’d as a test. Formatting, re-tensioning, a backup and restore all went well. I popped in one of my BBS tapes and it instantly jammed. The tape was all kinked up inside the cartridge and somehow looped between the top of a spool and the top shell.
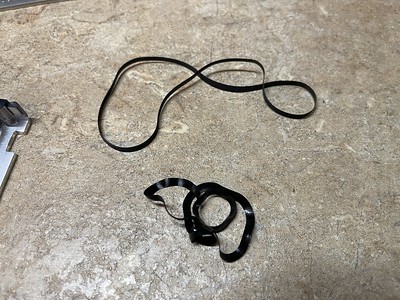
QIC-80 cartridges have an internal tension belt that wraps around the spools holding the magnetic tape, linking them together. Reading some blog posts it was mentioned that on older tapes these belts give out and cause the tape to slip or cause one spool not to pick up tape fed off the other spool, causing it to wad up. Fortunately it’s all contained within the tape cartridge, unlike a VCR or cassette tape player where it pulls the tape out and gets stuck in the reading mechanism. (Although in this instance, this wouldn’t even be a problem if the QIC tapes didn’t depend on a tension belt!)
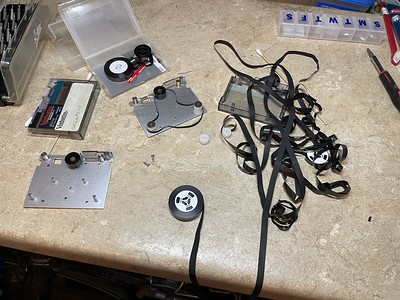
Again, being a do it yourselfer, how hard could it be? I have Youtube! I cracked open one of my BBS tapes and one of the “new” tapes to act as a donor. When I took the old tension belt off it just laid there like a limp noodle, it was clearly shot. The belt off the donor tape was clearly tighter, as soon as I had it off the spools it shriveled up, turned inside out into a wrinkly mess and I was worried that I could never get it back on.
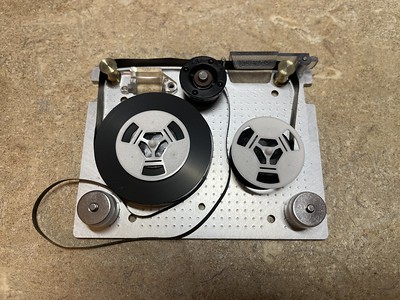
I wound up moving the spools containing the tape from the old cartridge into the donor cartridge, that way all of the spindles and belt were known to be in good working order. I noticed the crinkled part of the tape was at the beginning, before an index hole so I thought maybe the data survived unscathed. Re-tensioning the belt turned out to be quite the pain in the ass! I found out the belt has quite a bit of elasticity to it, I was afraid I was going to snap the sucker getting it on all the spools again but time and time again I could pull on it just enough to get it in place. I was using the end of a wooden swab to pull things around as to not damage it more.
After getting the cartridge back together, I inserted it into the drive and with a loud screech it instantly jammed again. I took the cartridge apart again, wound things back the way they should and did the tension fiddling again. It’s quite annoying if you have slack on one spool because you have to find something to fully hold the tension belt away enough to spin the spool to take up the slack, else it’ll never work out. A couple of times I had a twist in the tension belt to work out. I also learned the belt has to be aligned exactly in the middle of the tape, if it’s high or low then it tends to push the tape up or down as it feeds off the spool, leading to it coming off. Also all of the spools and spindles are held in place by the top part of the plastic case, so without it as you wind the spools everything wants to lift upward.
I found the best way seems to be to first pull the belt over the black spool that interacts with the capstan, feed it through between the two tape spools, pull it taught to make sure its relatively untwisted, bring it down across the left spool of tape, loop it over the left white spool, while holding tension to keep it flat and in place. Then pull on it with some force using a end of a wooden swab to get it temporarily over the top of the post of the right spool. Assess if there’s any twists, any slack in the tape media, and make sure it’s aligned. Finally, get a good grip on everything, use the same wooden stick to pull tightly (yet gently) to stretch out the belt enough to get it all the way over the right hand white spool. Check things over again for any twists, slack, and alignment.
On second attempt it fed a little while and then jammed again. I don’t know what the RPM of the tape drive is, but when it goes south it goes in a hurry. It’s maddening because I can spin the tape by hand a couple dozen revolutions when the cover is off and it all works perfectly. I repeated this tape disassembly and assembly two more times, all times resulting in a jam. The tape was getting pretty wrinkled now from all the wadding up, I can’t imagine there any good data on that section. To add insult to injury, I dropped the cartridge at one point and the spools went flying to the floor. Several feet of tape unspooled, instantly catching the attention of one of my cats. Completely frustrated, I gave up at that point. I got all the tape wound back up, the tension belt on once again, and quit. I’m going to outsource this data recovery job to somebody else. Just maaaybe having it wound up and under tension again may help smooth some of the wrinkles for the next person.
I give up
[…] A follow-up to https://binaryfury.wann.net/2023/07/2023-drive-belt-saga/ […]
[…] has been recovered from my 1995 backup tapes! After badly mangling one of my three QIC-80 backup tapes trying to repair it to make it readable, I gave up. Finally a couple of weeks ago I contacted […]