[flickr: trinity site]
[flickr: white sands missile museum park]
[flickr: new mexico museum of space history]
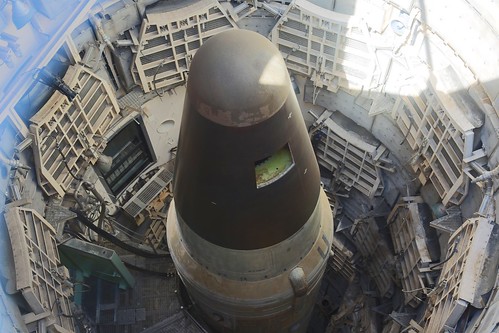
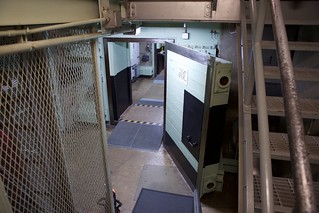
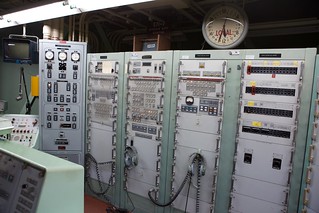
[flickr: titan missile museum]
The very first detonation of a nuclear device happened in New Mexico and was called “Trinity”. Two times a year people can go out onto the White Sands Missile Range to visit the Trinity site. I hit the road and visited the site a couple of weeks ago. It turns out it’s a long drive from the Bay Area to Alamogordo, New Mexico. The first day I put in 12 hours of driving, slept at a rest stop between Phoenix and Tucson, and then about 8 hours the next day.
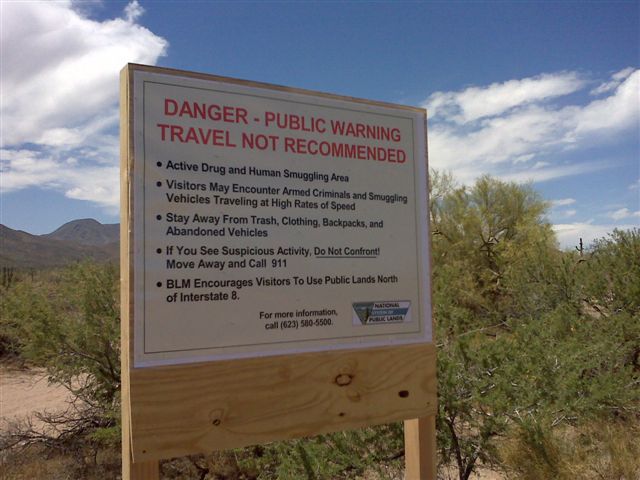
But first I wanted to make a detour to the Sonoran desert in Arizona. A while back I had found that in 2010 BLM put up these big scary “DANGER – PUBLIC WARNING TRAVEL NOT RECOMMENDED” signs due to smuggling and trafficking on public land along I-8. I wanted to go see one of these things out of curiosity. (Yeah, put up a sign that says don’t go there, I want to go there. Also hooray for Arizona having constitutional open and concealed carry, I felt the freedom wash over me as soon as I hit the border.) Through the Sonoran Desert National Monument along I-8 there actually weren’t that many exits off of the interstate. To get onto BLM land, was one at MM 144 for Vekol Valley Road, MM 140 for Freeman Road, and then a couple around Gila Bend, the next city on the interstate.

2010 BLM travel danger sign
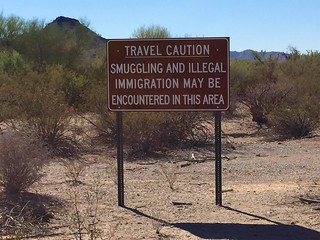
More tame sign on BLM land
I didn’t have a good map of the BLM roads, Google Maps and my Garmin maps were pretty useless for this, and the BLM website is pretty dorky. I nosed around on Freeman Road a bit and only found a tame “Active Federal Law Enforcement Patrol Area” sign. Same at Vekol Valley, except this time I found a paper map I could take. I will say the established gravel roads are pretty good and well marked with numbers. Deciding not to get too far in the middle of nowhere I came back to the highway. Later I found out the big scary warning signs caused such an uproar and embarrassed the government so much they replaced them a few months later with the tamer signs I saw. If anyone knows if there are still big scary signs out there, I’d love to know where!
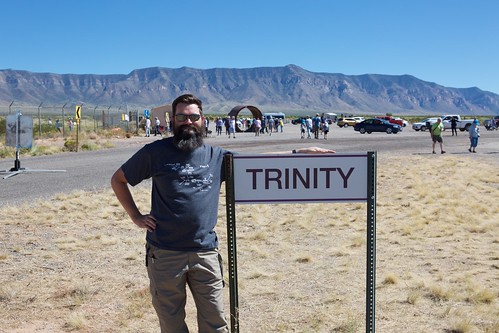
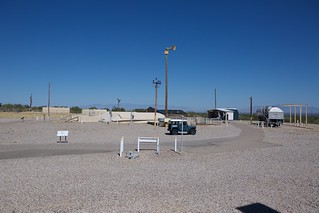
Trinity site tour
I stayed in Alamogordo and quickly figured out it was a lot farther to the Trinity site than I thought. It turns out WSMR is huge, probably 100 miles wide and even more miles long. The only public entrance was Stallion Gate, at the northern part of WSMR. This was about 120 miles away from Alamogordo. There was an escorted vehicle convoy that left just north in Tularosa which cut directly across the range, cutting the distance down to about 70 miles. However it was slower, so from a time perspective I think it was a wash. The upshot is that you get to see much more of the range as you travel through. Downside is there isn’t much to see except desert scrub and the occasional launch site, and photography or stopping was prohibited.
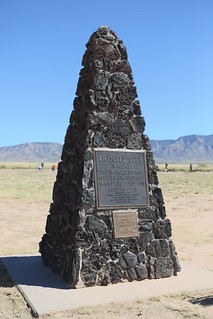 There were 100-200 vehicles in the convoy and we arrived at the site around 10:45 AM. There was a huge parking lot by the Trinity site and a string of cars coming in from the northern gate. In the parking lot were a couple of vendors selling food and souvenirs, porta-potties, the Jumbo test casing, and a ton of police, military police, and a lot of other Army and Navy folks. A short walk leads to the actual ground zero test site. Within the fenced in area (a couple of acres in size) was a monument to the Trinity test, a tractor-trailer hauling a Fat Man casing, a concrete stub where the test tower was, and string of historical photos hanging on the fence. There was a sign reminding us that there was still some scant radiation here, but 1 hour at the site was less than 1/10th the exposure of a chest x-ray.
There was also a ton of people because everyone got there at the same time. Everyone was jockeying for position to get photos with the monument and milling around the Fat Man trailer. I was amused to overhear this one bit of conversation:
Girl 1: That kid was dabbing while he got his photo taken, that's so disrespectful.
Girl 2: Disrespectful to who?
Yes, disrespectful to who? Nobody is buried here. Anyways the photos along the fence were interesting, it showed how the site looked before testing, the nuclear fireball, and what things looked like after.
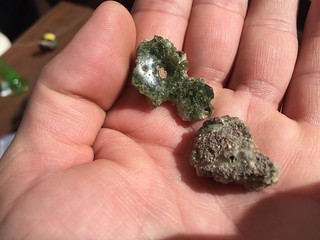
Trinitite
If you looked carefully on the ground, you could spot some bits of trinite that hadn’t been buried, but largely it had been picked pretty clean over the years. In theory you’re not supposed to remove it because “theft to the government”, good luck enforcing that. There was a table at the entrance where a docent had a box of trinite you could look at and stick a geiger counter to it.
What was interesting about the site and not really easy to show in a photograph was that the whole test area was in a huge depression. According to the docent, beyond the actual bomb crater and the sand that was turned to trinite, there was about a 4 foot layer of desert sand kicked up and displaced after detonation. It looked like the fenced in area contained the entire depression, it was most visible from the parking lot.
I wanted photographs without people in the background, so I lingered around for a couple of hours until the Alamogordo convoy left. This means I’d have to leave north through the Stallion Gate. After 1 PM things started thinning out and I was mostly able to get the photos I wanted. I missed out on visiting the McDonald House, I didn’t see that there was a separate shuttle that went over to it.
When I left the range and got back on the highway, there was a guy named “Atomic Steve” selling hunks of uranium. There was also a sign directing people to where trinite was for sale. Some may say that’s illegal, but apparently way back when there were considerable mounts to be collected from the land and people are selling it. You’re just not supposed to remove it from the Trinity site.
So pro-tip if you’re wanting to visit only the Trinity site, don’t stay in Alamogordo. Find a place to stay closer to the northwest corner and get there early. From the gate to the site is only about 5 miles. I wanted to check out White Sands National Monument too and wound up discovering the New Mexico Museum of Space History in Alamogordo so that worked out pretty well for me.
White Sands Missile Park
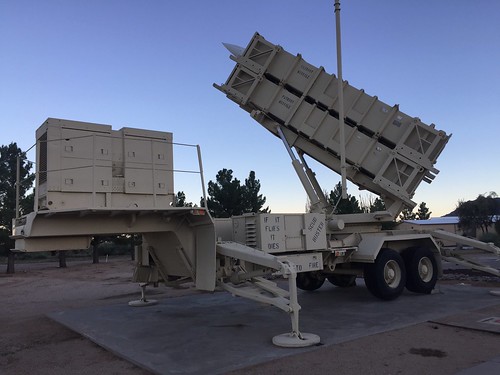
Patriot: If it flies it dies
The same afternoon I left Trinity, I headed south to the White Sands Missile Museum. This was another long haul, about 140 miles from Stallion Gate, through Las Cruces, then over to White Sands. The actual museum closed at 3 PM so I missed it by an hour, but the missile park was still open until sunset. I rolled up to the base gate where police had me park outside the gate and gave me a pass to walk over to the missile park.
On highlight were dozens of missiles and rockets that had been tested at the range. Some were popular, some were unknown to me. There was a Redstone rocket, a Patriot missile system, an Army Pershing missile, various Navy guided missile systems, Nike Ajax and Hercules missiles, and all sorts of other surface-to-air, surface-to-surface, surface-to-ground missiles.
New Mexico Museum of Space History
 It turns out there was a lot more early aerospace work done in New Mexico than I realized. Beyond the Trinity test, Wernher von Braun was stationed in Fort Bliss and they did V2 testing at the White Sands Missile Range. WSMR was where things like the Patriot missile system, Pershing, Redstone rockets were tested. Joe Kittinger did his record setting Project Excelsior skydive from 102,800 feet over New Mexico. Columbia landed here in 1983 as a test for STS-3. Virgin Galactic’s Spaceport America is here. I guess huge swaths of relatively flat, uninhabited, year-round mild weather is pretty useful for this stuff.
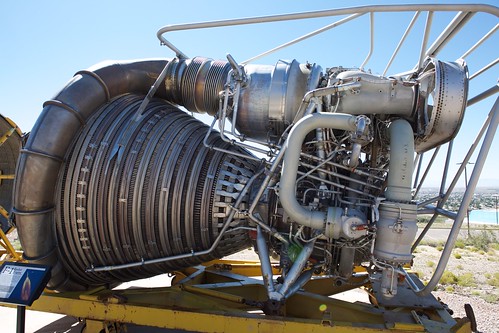
Outside the museum building was a collection of missiles and rockets. They had leftovers of a V2 engine from a test, but most impressive was a fully intact F-1 rocket engine which was built for the Apollo program for use in Saturn V rockets. The thrust nozzle material couldn’t have been more thick than a couple of credit cards, and there was an incredible amount of welds that stretched for several feet, every couple of centimeters. I imagine welders at Rocketdyne spent a huge swath of their career just patiently dabbing in welds on a single engine.
Inside the building were mainly exhibits highlighting the aerospace industry in New Mexico as I mentioned earlier. They had several components from the Apollo program on display.
White Sands National Monument
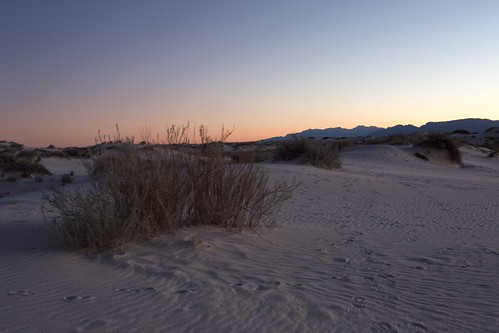 I wish I could’ve spent more time here but I didn’t time it right and I needed to cut my trip short. I made one trip out at 7 PM right after sunset and right before the gates closed. It was pretty tolerable then and the sand made for some neat long exposure photographs. I came back here Saturday after visiting the museum in the dead heat of the afternoon and got cooked. There were loads of people in swimsuits sledding down the sand dunes, treating it like an ocean-less beach. I should’ve waited around a couple of hours for it to cool off before exploring more. I’m told the thing to do is to come out after sunset, setup camp at a campsite, goof around overnight, then leave when the sun comes up. Saving that for next time!
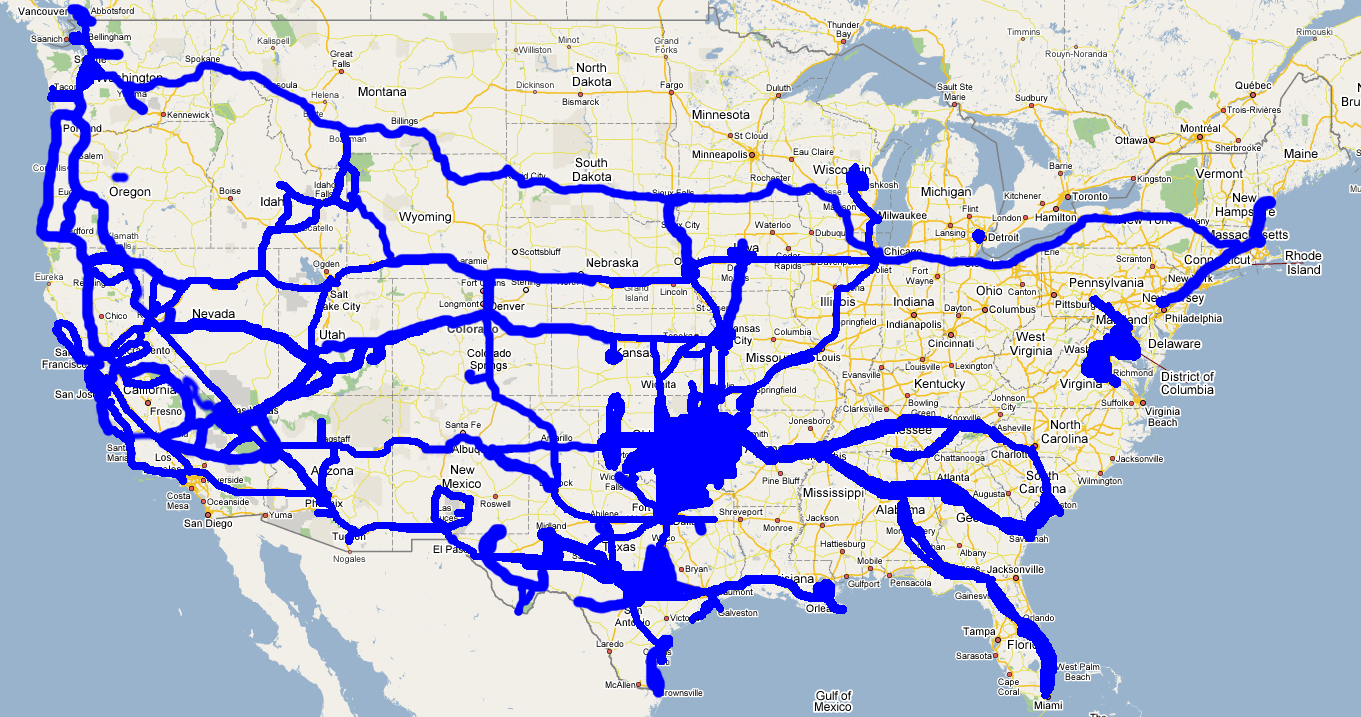
Mileage
10/5
1:56pm  320,502  Fremont, CA  8,431.1 hr
6:18pm  320,782  Tejon
8:35pm  320,909  Fontana, CA
11:05pm 321,092  AZ border
2:09am  321,274  Casa Blanca rest stop
10/6
4:10pm  Deming, NM
10/7
6:35am (M)  321,864  Alamogordo, NM
10:00am (M) 321,940  WSMR staging
10:30am (M) 321,945  Trinity site
10/8
8:23pm  322,573  Tucson, AZ
10/9
9:00pm  Phoenix, AZ
10/10
7:25am  323,243  Tejon rest stop  8,476.7 hr
12:00pm 323,538  Fremont, CA - HOME
Tags: atomic tourism


